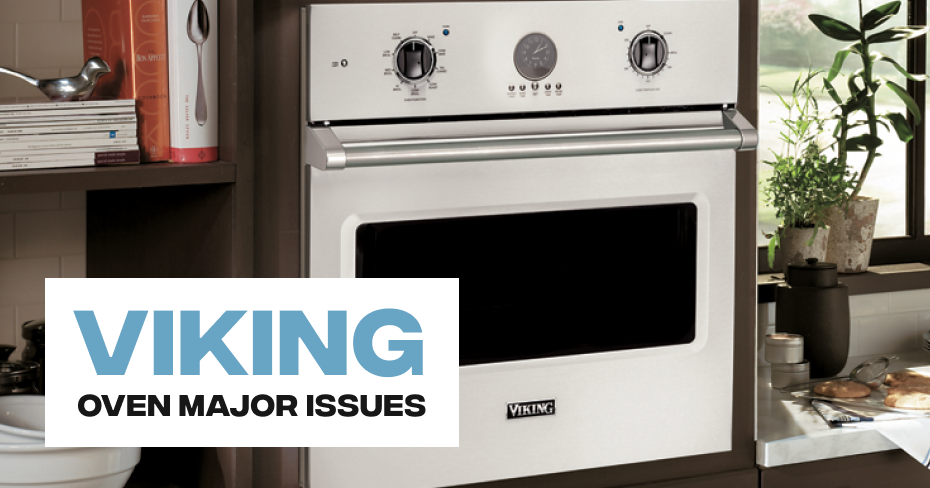
Viking Range Faulty Igniters
Viking stove ranges use an electrical ignition system to light gas coming out of the burner. Turning the gas control knobs at the front of the unit to the “light” setting causes the electric ignition to create a spark. The spark ignites the gas. An ignitor that keeps clicking might not create the spark necessary for ignition. Replacing the ignitor or the ignition switch at the front of the stove may be necessary to repair the issue.
Opening Up the Stove
To access the ignitor, you need to lift up the hood of the stove. Before working on the stove, unplug the stove from the wall. This prevents shocks or accidentally lighting the stove while working. Lift up on the front of the stove to prop up the lid on its hinges. Slide a putty knife under each side of the stove top if the hood doesn’t release.
Cleaning the Ignitor
Food cooked on the stove top may spit grease into the air that can clog the ignitor and prevent a spark from occurring when the switch sends an electrical signal to the ignitor. Scrub the ignitor with a toothbrush to remove as much grease and grime as possible. Do not use water because this may prevent the electrode from working properly.
Replacing the Ignitor
The ignitor is attached to a metal brace running along the oven top. Remove the screw from the bottom of the ignitor to release it from the brace. Pull on the wire at the bottom to remove it from the connector, or release the entire wire from the switch at the front of the stove. Contact Viking for a replacement ignitor for your stove model.
Switch
The switch is located behind the gas control knobs at the front of the stove top. The switch provides the electric signal required for the ignitor to work. Pull off the knob at the front of the stove for the faulty ignitor. Pull the switch out and loosen the screw holding the ignitor wire in place. Insert the wire into the new switch and test.
How to Repair the Electronic Ignition on a Gas Stove
Gas stoves commonly have an electric ignition system. This ignition system provides a spark to the gas supply exiting from the burners. A small switch on the front of the oven, or the gas control panels themselves, activate the sparking ignition. If the system has bad wiring or a blown fuse, the oven will not light no matter how long you activate the ignition. Most ovens have fuses and ignition systems that are simple to access and repair.
Step 1
Unplug your unit and turn off the gas supply at the saddle valve near the unit.
Step 2
Lift up the hood of the oven. If you have sealed burners, the lid will not lift up. Locate the ignitors near the burners of the unit. Clean any gunk away from the ignitor using a toothbrush. Test the unit.
Step 3
Pull the burner dials off the front of the unit if the ignitors won’t work.
Step 4
Remove the screws at the ends of the front cover, where the gas supply knobs are located, using a screwdriver, and remove the cover from the oven.
Step 5
Slide the wires off the burner valve switches and pull them off the burner valve by sliding the switch forward. The switch will have wires attached to it. Loosen the screws holding down the wires of the burner valve. Pull out the wires carefully. Place the wires in a new switch. Slide the new switch onto the burner valve. Replace the knob, and turn on the gas supply and power. Ignite the burner.
Step 6
Follow the switch wires into the oven if the new switch doesn’t work. Locate the module box, which is usually 2 inches by 3 inches. Slide the wires out of the module terminal by pulling on the wire connectors. Remove the screws from the old module and pull the module out. Insert the wires into the new module, using the same wire orientation as before. Reassemble the oven. Turn on the electricity and gas, and turn on the burner.
Viking Range Uneven Cooking Temperatures
Cooking in the oven is something not everyone is comfortable with or has mastered, but it’s a wonderful way to cook if you enjoy baking, roasting, indoor steaks, and frozen meals. Cooking things in the oven can be quick and toasty or prolonged, allowing you to do other things while the food bakes. But there’s one thing that can throw off any oven game, pro or amateur, in the kitchen: uneven cooking. The oven is supposed to heat all contents evenly, from the bottom or top heating elements, or both at once. However, when the heating elements are not heating evenly or when the oven is somehow otherwise producing unevenly cooked food, it’s time to troubleshoot. Some uneven cooking problems you can DIY resolve at home, while others will require a technician to perform the necessary repairs. In most cases, you can figure out what’s wrong with a little experimentation. Check out the top seven reasons why ovens cook unevenly and see if you can find your solution.
The Oven Feet Are Not Level
Most ovens are free-standing, set into a slot in the countertop. This means the oven is set on its own four feet, but those feet might not be even. Appliances tend to have self-leveling feet, which means the front feet are adjustable and the back feet are designed to adapt. Grab a bubble-level and test the top surface and bottom edge of your oven. If they are not level, then you’ll need to adjust the front feet. This can be done with a simple twist. The feet are each a screw, so unscrewing the foot makes it taller and the reverse makes it shorter. Adjust until the top and bottom of your fridge are level.
Bonus Tip: If the top and bottom lines of your stove don’t line up, the appliance may have warped with time and heat. This is a common sign of a slightly defective model and usually needs to be replaced.
Crooked Oven Rack
A similar problem relates to your oven rack. Even if the oven is level, your rack may not be. Racks can be bent, set crooked in the tracks, or warp over time. Grab that bubble level and test whether your racks are flat. Then test the racks and tracks separately. Lay unimportant towels on the counter and set the oven racks on them. The counter will show you if the racks can lie flat without wobble. From there, you can inspect the tracks for obstructions, warping, and design flaws.
The three solutions to an uneven oven rack are to re-set the racks, clean the oven, or replace the racks.
Gas Ignitors can get weak
Oven ignitors can get weak over time and while they will get hot enough to glow they might not be getting hot enough to light the gas in the oven to start raising the temperature. Replacing the ignitor is the only way to solve this issue.
Leaving Pans in the Oven
In some households, the oven is a perfectly good place to store pans. Whether those pans are forgotten from quick toasting or are clean and stored, having extra pans in the oven while cooking is never a good idea. You see, the pans absorb some of the heat and block it from reaching your cooking dish. Uneven distribution of pans can, understandably, result in an uneven distribution of heat causing your food to cook unevenly.
The solution? Get those pans out of there. If you do use your oven for storage, clear the space before pre-heating. If you tend to forget pans, check every time before you turn on the oven.
Cooking Multiple Oven Dishes at Once
Another problem can be trying to multi-task too much with your oven. It is possible to cook multiple items at once, but you must do so strategically. Ensure that each dish is capable of receiving the necessary heat and distribution. Baking, for example, is best done with dishes that are side-by-side so that heat from the top and bottom aren’t blocked. You can also warm items in the oven on the same or nearby pans.
However, it is often necessary to increase your oven temp and cook times for everything to cook through. You should also simultaneously cooking dishes of drastically different consistency and that might block heat from one another. If you’re not sure, just cook one dish at a time.
The Oven Control Circuit is Busted
The most insidious problem is one involving your oven computer. most ovens have one circuit control board that determines the correct temp, runs the timer, and so on. The newer your oven, the more complex this built-in computer will be and the more ways it can malfunction. If the circuit board is not sending the right signals, then your heating elements will not activate properly. This will need to be identified by opening the oven and applying a multimeter to determine if the circuits are sending the signal correctly.
Your Temperature Sensor is Broken
Finally, it’s possible that your oven’s internal thermometer is broken or malfunctioning. If so, the oven would not heat to the correct temperatures based on your settings and might not be able to maintain temperature. This can result in irregular and potentially uneven heating, sure to cause dishes to come out less than optimal.
A broken temperature sensor is surprisingly easy to replace, simply switch the wire harness from the old piece to a new one. The trick is to clamp the internal wires to the oven wall so it doesn’t fall back.
Viking Oven Strange Noises
For those passionate about baking, the Viking oven emerges as the ultimate choice, offering a blend of premium craftsmanship, durability, and cutting-edge features that elevate cooking precision. With a diverse collection encompassing various features, styles, and types, Viking ovens provide a spectrum of options to cater to your culinary preferences.
However, even the most sophisticated appliances, like the Viking oven, are susceptible to issues arising from their internal components. To address these concerns effectively, professional Oven Appliance Repair becomes a crucial consideration. Expert technicians, well-versed in handling a myriad of appliance issues, conduct thorough diagnoses to identify the root causes of problems, whether related to the fan or other internal components. This meticulous approach ensures the application of precise solutions, employing the right tools and equipment for enduring repairs.
Being a diligent homeowner entails ensuring all appliances function optimally. A noisy oven, beyond being an inconvenience, could signify an underlying problem demanding immediate attention. Typically, unusual sounds emanating from the oven hint at issues with the fan motor. Most ovens house two fans – the cooling fan and the circulation fan – and over time, wear and tear in these components can result in disruptive rattling noises during oven operation.
Addressing a noise issue may involve investigating simple causes like a loose blade or fixing nut. Tightening any loose bolts or screws is an initial step to ensure the secure placement of all components. Oven fans generally comprise three distinct parts: the fan motor, blade, and fixing nut. If securing these parts does not resolve the noise, considering the replacement of the fan component may be the next necessary step.
Viking Oven Convection Fan Not Working
Understanding the Components of a Viking Oven Convection Fan
To effectively troubleshoot a Viking oven convection fan not working, it’s essential to understand the components that make up this important part of your oven. Here are the key components to know:
- Fan: The fan is responsible for circulating hot air around the oven, ensuring even cooking and browning. It’s typically located at the back of the oven and can have one or two blades.
- Fan Motor: The fan motor drives its blades, ensuring it rotates quickly. A malfunctioning fan motor can cause the fan to stop working altogether.
- Relay Board: The relay board is the component that controls the fan motor, turning it on and off as needed. It receives signals from the thermostat, which tells it when to start and stop the fan motor.
- Thermostat: The thermostat is the temperature control device that signals the relay board to turn on and off the fan motor. If the thermostat is not functioning correctly, it may not signal the relay board to turn on the fan motor, leading to fan problems.
By understanding these components and how they work together, you’ll be better equipped to troubleshoot and identify the cause of your Viking oven convection fan not working.
Now, let’s look at some troubleshooting tips below:
Check the fan blades: Over time, fan blades can become clogged with debris and dust, causing them to spin slowly. Do the following steps to clean the component effectively:
- Turn off the power supply.
- Open the oven door and remove any racks that may obstruct the fan.
- Look for any visible damage or obstruction on the blades.
- Use a flashlight to get a better view if necessary.
- Gently spin the fan blades to check for any resistance or wobbling.
- If there is any damage or obstruction, clean or replace the blades as necessary.
Inspect the fan motor: If the fan blades are clear of debris, the issue may be with the fan motor. Inspect for any visible damage or signs of wear and tear. Do this:
- Turn off the power to the oven.
- Locate the fan motor, typically located at the back of the oven.
- Inspect the motor for any signs of damage, such as burnt or frayed wires.
- Test the motor using a multimeter tool to check the power.
- If the motor fails the continuity test, it may need to be replaced.
Test the thermostat: A faulty thermostat can also cause fan operation issues. Do the following steps:
- Turn off the power to the oven.
- Locate and remove the thermostat.
- To verify its continuity, use a multimeter to test it.
- Remove and replace the thermostat if there is no continuity.
- If the thermostat is functioning properly, reinstall it and turn on the power to the oven.
Check the relay board: The relay board controls the fan motor, so if it’s not working correctly, the fan may not work either. Examine for any apparent damage or evidence of wear and tear. Do the following steps:
- Turn off the power to the oven.
- Locate the relay board, typically found at the back of the oven.
- Inspect the relay board for any visible signs of damage, such as burnt components or loose connections.
- Use a multimeter to test the relay board for continuity and proper voltage.
- If the relay board is determined to be defective, replace it.
If these troubleshooting tips don’t solve your Viking oven’s convection fan not working problem, it’s time to call the professionals.
Viking Oven Self-Cleaning Problems
A Viking oven is an appliance that makes our life easier. Viking is a world-renowned brand that provides so many options where you can cook, roast, bake, heat, or even dry. Even if it is a high-end appliance, your Viking oven can malfunction.
Many consumers call professionals to repair the issue, but as a matter of fact, you can easily troubleshoot the glitch on your own. Well, if you are searching for ways to fix your Viking oven, stop right here! This article will discuss some common issues related to your Viking oven and introduce some tips and ways to troubleshoot the issue without any professional help.
Common Issues Of Viking Self-Cleaning Oven
Before we get down to business, we need to know about the common issues that can malfunction your appliance. Your Viking oven has so many working and critical parts that are prone to problems, and we are here to discuss five problems that are very common in Viking ovens.
Your Oven Takes So Much Time To Heat Up
Generally, you would see a Viking oven has two fragile points- heating elements and a thermostat. If you see the machine is not able to reach the temperature, there is a possibility that something is wrong with either of these parts. Check the heating elements if they are not heating the way they are supposed to. Make sure to check the contact points of these parts.
Your Oven Won’t Start
If your Viking oven doesn’t turn on, whether it is a gas or electric oven, the first thing while troubleshooting a range that doesn’t turn on is to examine the breaker box. For example, a power surge may result in the circuit breaker switch tripping in the “off” position.
While checking the switch that runs your oven, make sure the switch is in the “on” position, and the oven is connected to a 220-240 V outlet in order to supply sufficient power.
A malfunction in the thermostat, a defective oven temperature sensor, or a faulty control board can also prevent the oven from turning on properly. In the case of a gas oven, the gas valve or the igniter can cause the problem.
Your Oven Door Doesn’t Close Properly
If you see the door hinges not closing properly, it may be time to replace it. You need to disassemble the door and might also remove the side panel as well. Check if the oven racks are properly installed.
Your Oven Won’t Cook Evenly
The bake and broil elements need to be checked for this issue. If the elements aren’t conducting the heat as they are supposed to be, do a visual test by preheating the oven. If the bake and broil elements are glowing red colour, everything is fine.
Set your oven to a bake setting and check if the bake and broil elements at the bottom are constantly glowing red. If you notice some blisters or breaks in either of them, replace them immediately.
Your Oven Light Isn’t Working
If you see the light not working properly, an easy troubleshoot will be to replace the light bulb with a new one. Check the user manual and use a bulb with the right wattage according to the recommendation in the manual.
If you still face the problem, call an electrician to check the issues, including the control board, and the light switch. We strongly prohibit you from checking for yourself unless you are a certified electrician.
The Burner Isn’t Igniting
In most cases, you will see the burners fail to ignite due to clogged burners. The method is simple, just take off the burner from the oven and clean it properly.
This will be likely to solve the problems with the burners. It is good for your appliance to clean the burner regularly. It will ensure its longevity.
If the burner isn’t working even after changing or cleaning, you will need to check the electrode. If the electrode is not getting enough power, it will not heat up and prevent the burner from igniting.
Call a professional technician to change the electrode, and make sure you are buying the electrode from a quality brand for longer functionality.
Oh, another thing, change the knobs also; a faulty knob can also affect the ignition.
The Igniter Won’t Spark
Sometimes issues may arise from a dislocated igniter. This can happen if the electrode fails to create the electric arch with the burner’s surface, to be precise.
You can notice this issue if the electrode is too far away from the surface of the burner. This can also be caused by food residues clogging the burner.
The first step of troubleshooting this problem is to check the burner if it is cleaned. If the burner is clear of food residues, make sure the burner cap is in the right place.
Moreover, check if the burner cap sits firmly over the burner head. Touch the cap and make sure it doesn’t wobble much.
The Self-Cleaning Function Stops Working
If the self-cleaning feature is off the chart, push the range door closed. Make sure to shut the door tightly or the self cleaning process will not start. If you still face the issue, the temperature knob might be the problem in this case.
Viking Oven Door Issues
Viking ovens are renowned for their performance, but like any appliance, they may encounter issues over time. One common problem users may face is with the oven door. Here, we’ll explore signs of Viking oven door issues and offer potential solutions.
-
Difficulty in Opening or Closing:
The oven door is hard to open or close smoothly. Hinges, gaskets, or springs may be damaged, misaligned, or worn out.
-
Loose Door Seal:
The door seal (gasket) appears loose or is visibly damaged. Wear and tear, damage, or improper installation of the door seal.
-
Oven Door Misalignment:
- Symptom: The oven door is not aligned properly, causing uneven gaps.
- Possible Causes: Hinge issues, misalignment, or problems with the door frame.
Troubleshooting and Solutions:
- Inspect Hinges and Springs: Examine the hinges and springs for any signs of damage or misalignment. If issues are detected, hinges or springs may need adjustment, repair, or replacement.
- Check Door Seal (Gasket): Inspect the door seal for damage, wear, or improper installation. Replace the door seal if it is damaged or not providing a proper seal. Ensure correct installation.
- Align the Oven Door: If the door is misaligned, adjust it to ensure an even fit. Proper alignment can often be achieved by adjusting the hinges or leveling the oven.
- Tighten Screws and Bolts: Check for any loose screws or bolts on the door assembly. Tighten any loose components to ensure stability and proper functioning.
- Professional Assistance: If troubleshooting steps do not resolve the issue, seek professional assistance. Certified technicians, like those at Appliance Repair Los Angeles, can provide expert diagnosis and repair for complex door issues.
Preventive Tips:
- Regular Cleaning: Keep hinges and other door components clean from debris to ensure smooth operation.
- Careful Use: Avoid slamming the oven door, as this can contribute to misalignment and damage.
- Prompt Repairs: Address any door issues promptly to prevent further damage and ensure the oven’s optimal performance.
Viking Oven Control Panel Malfunctions
Viking ovens are sophisticated appliances designed for precision cooking, but like any technology, they may encounter issues over time. One common problem is control panel malfunctions. Here, we’ll explore signs of control panel issues in Viking ovens and potential solutions.
Signs of Control Panel Malfunctions:
- Unresponsive Buttons: Buttons on the control panel do not respond when pressed. Damaged touchpad or control board.
- Display Problems: Erratic display behavior, flickering, or blank screen. Faulty control board components or electrical issues.
- Incorrect Temperature Readings: The displayed temperature does not match the actual oven temperature. Malfunctioning temperature sensor or control board.
- Program Errors: Incorrect or erratic oven operation when following programmed settings. Control board glitches or internal programming issues.
Troubleshooting and Solutions:
- Power Reset: Turn off the oven, unplug it from the power source, and wait for a few minutes before plugging it back in. A power reset can sometimes resolve temporary glitches in the control panel.
- Button Inspection: Inspect control panel buttons for physical damage or sticking. Clean or replace damaged buttons to restore functionality.
- Software Update: Check if there are available software updates for your oven model. Updating the oven’s software can address performance and control panel issues.
- Professional Diagnosis: If issues persist, seek professional assistance. Certified technicians, such as those at Appliance Repair Los Angeles, can conduct a thorough diagnosis to identify and address control panel malfunctions accurately.
- Control Board Replacement: If the control board is deemed faulty, it may need replacement. Professional technicians can replace the control board to restore proper functionality.
Preventive Tips:
- Regular Cleaning: Keep the control panel clean from spills and debris to prevent damage.
- Proper Usage: Follow the manufacturer’s guidelines for oven use and avoid excessive force when using the control panel.
- Timely Maintenance: Schedule regular maintenance checks to identify and address potential issues before they escalate.
Viking Oven Faulty Igniters
Viking ovens, known for their precision and performance, may experience issues with faulty igniters over time. A faulty igniter can disrupt the ignition process, hindering your oven’s ability to reach and maintain the desired temperature. Below, we explore common signs of faulty igniters in Viking ovens and suggested solutions.
-
Delayed Ignition:
The oven takes an extended period to ignite or does not ignite at all. A faulty igniter may struggle to generate sufficient heat for ignition.
-
Weak or No Flame:
The oven flame is weak, inconsistent, or fails to establish. Insufficient heat output from the faulty igniter can result in a weak or non-existent flame.
-
Gas Smell:
The presence of a gas smell when attempting to ignite the oven. A faulty igniter may lead to gas leakage without proper combustion.
Troubleshooting and Solutions:
-
Visual Inspection:
Inspect the igniter for any visible damage, cracks, or signs of wear. If damage is evident, replacing the faulty igniter is recommended.
-
Igniter Cleaning:
Clean the igniter gently using a soft brush to remove any accumulated dirt or debris. Improved cleanliness can enhance the igniter’s performance.
-
Igniter Testing:
Use a multimeter to test the igniter for continuity and ensure it is receiving power. If the igniter fails the continuity test or does not receive power, replacement is advised.
-
Professional Assessment:
If troubleshooting steps do not resolve the issue, seek professional assistance. Certified technicians, such as those at Appliance Repair Los Angeles, can conduct a thorough assessment and replace the igniter if necessary.
-
Safety Precautions:
Always prioritize safety. If you suspect a gas leak or encounter persistent issues, turn off the gas supply and seek professional help immediately.
For Viking oven faulty igniters, timely identification and resolution are crucial. Professional technicians, equipped with the expertise to diagnose and replace faulty components, can ensure your Viking oven operates safely and efficiently.
Viking Oven Temperature Inaccuracy
It will be impossible to bake a cake if your oven temperature is not accurate. There are three top parts which influence the temperature.
Firstly, check the control thermostat. The temperature control thermostat monitors the temperature inside the oven and cycles on the heat when the oven temperature gets too low. If the temperature control thermostat is not calibrated correctly, it won’t cycle on the heat at the proper time. As a result, the oven temperature might be too high or too low. Due to its complexity, the thermostat is very difficult to test.
Then, make sure the sensor works properly. The oven sensor works in conjunction with the oven control board to regulate the temperature. The sensor regulates the oven temperature by varying its resistance to electrical current as the oven temperature varies. As the oven temperature rises, the oven sensor creates greater resistance. If the sensor gives the wrong amount of resistance, the oven may not bake evenly. On some models, you can recalibrate the oven control up to 35 degrees Fahrenheit higher or lower. Refer to your owner’s manual for instructions on how to recalibrate the oven control.
Finally, it is time to check the control board for defects. The oven control board works in conjunction with the oven sensor to regulate the temperature. The sensor regulates the oven temperature by varying its resistance to electrical current as the oven temperature varies. As the oven temperature rises, the oven sensor creates greater resistance. If the sensor gives the wrong amount of resistance, the oven may not bake evenly. Or if the oven control board does not read the sensor resistance correctly, the oven temperature may be inaccurate. On some models, you can recalibrate the oven control up to 35 degrees Fahrenheit higher or lower.
Viking Oven Uneven Heating
Addressing uneven heat in your Viking oven involves a systematic approach to troubleshooting. Follow these steps to identify and resolve the issue:
-
Inspect the Temperature Sensor:
Examine the oven’s temperature sensor for any visible signs of damage or displacement. The sensor plays a crucial role in regulating the oven temperature.
-
Calibrate the Oven Temperature:
Refer to the user manual for instructions on calibrating the oven temperature. This ensures that the temperature setting matches the actual temperature inside the oven.
-
Clean Heating Elements:
Ensure the oven’s heating elements are clean and free from debris or food residues. Dirty elements can impede the distribution of heat, leading to uneven cooking.
-
Check the Oven Door Seal:
Verify that the oven door is properly sealed. A tight seal prevents heat from escaping, contributing to consistent temperature throughout the oven.
-
Professional Assessment:
- If the issue persists, it may indicate a more complex problem, possibly with the control board or heating element.
- Professional repair or replacement may be necessary to address these issues effectively.
-
Contact Viking Service Center or Technician:
- Reach out to an authorized Viking service center or a qualified technician with expertise in Viking appliances.
- Provide detailed information about the issue and any troubleshooting steps you’ve taken.
-
Accurate Diagnosis and Resolution:
- A trained technician will conduct a thorough diagnosis to pinpoint the exact cause of the uneven heating.
- Based on the assessment, they will recommend and implement the necessary repairs or replacements.
By following these steps and seeking professional assistance when needed, you can ensure that your Viking oven delivers consistent and even heat, enhancing the overall cooking experience in your kitchen.