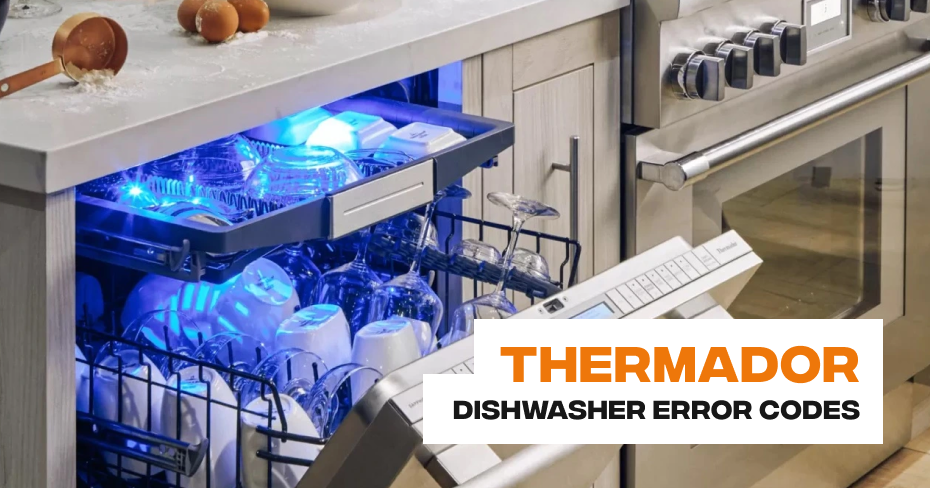
Thermador Dishwasher Error Code E24
In the world of dishwashers, efficiency is key. Thermador dishwashers are renowned for their top-tier performance, but like any appliance, they can occasionally encounter hiccups. When your Thermador dishwasher displays error code E24, it’s a clear indication that something is preventing it from draining correctly. Fortunately, this issue is often fixable with a bit of troubleshooting. Let’s explore the potential causes and solutions for this common error code.
1. Frozen Drain Line:
If you reside in an area with extremely cold temperatures, the drain line may freeze, obstructing proper drainage. In such cases, patience can be your best friend. Simply wait for the line to thaw naturally, and the issue should resolve itself.
2. Check the Inlet Hose:
Start by ensuring that the dishwasher is unplugged and the power is turned off for safety. Examine the inlet hose for any kinks, blockages, or signs of damage. A kinked or damaged hose can impede water flow, leading to drainage problems.
3. Inspect the Spigot:
Examine the spigot that connects your dishwasher to your home’s draining system. This connection is vital for proper drainage. Make sure it is securely attached and free from any blockages or obstructions.
4. Examine the Waste Water Pump:
The waste water pump is a critical component responsible for pushing out used water from your dishwasher. Check it for any clogs or blockages that might be hindering its operation. Clear any debris you find.
Resolving error code E24 on your Thermador dishwasher often involves identifying and addressing these common issues. By following these steps, you can potentially restore your dishwasher’s drainage function and get back to enjoying its efficient performance.
Thermador Dishwasher Error Code E23
Error Code E23 on your Thermador dishwasher signals an issue with the drain pump. This code typically appears when the drain pump is clogged, blocked, or experiencing a malfunction. When confronted with this error, here are the steps to diagnose and resolve the problem:
1. Accessing the Drain Pump:
- Begin by lifting up the spray arm to move it out of your way.
- Remove the dishwasher filter and set it aside to access the pump area.
2. Inspecting the Pump Cover:
- Use a spoon or a tool to carefully remove the pump cover located beneath the filter.
- With the pump cover removed, you will have access to the pump impeller spinner.
3. Check Impeller Movement:
- The impeller should move freely without any obstruction. If it’s stuck or not spinning properly, it’s a clear sign of a problem.
- Inspect the area for any debris that might be obstructing the impeller. Be cautious, as there could be sharp objects, like glass, hidden in the debris.
4. Removing Debris:
- If you find debris causing the impeller blockage, carefully remove it. Using thick gloves is recommended to protect your hands from potential sharp objects.
- Clearing the impeller area of any obstructions is crucial to restore proper drainage.
5. Reassembling and Testing:
- After removing the obstruction, reassemble the dishwasher. Put the pump cover, filter, and spray arm back in their respective places.
- Run a test cycle to ensure that the drain pump functions correctly and that the E23 error code is no longer displayed.
If you’re uncomfortable with these steps or if the error code persists after your DIY efforts, it’s advisable to seek professional assistance. Experienced appliance repair technicians can provide a thorough inspection, identify underlying issues, and perform the necessary repairs to ensure your Thermador dishwasher operates flawlessly.
Thermador Dishwasher Error Code E22
In the world of dishwashers, Thermador stands as a paragon of quality and innovation, but even the best appliances can face occasional hiccups. One such hiccup is Thermador dishwasher error code E22, which can signal a problem with the filter. In this blog, we’ll delve deeper into understanding this error code, its implications, and how to resolve it effectively.
Error Code E22 – Filter Needs Cleaning:
Error code E22 is a common issue faced by Thermador dishwasher owners. It typically occurs when food particles and debris become trapped in the dishwasher’s filter, obstructing the flow of water and leading to a less efficient cleaning cycle. Fortunately, this error code is relatively simple to address, and you don’t necessarily need to call in a technician.
Steps to Resolve Error Code E22:
To clear error code E22, you can follow these straightforward steps:
- Locate the Filter: The filter in your Thermador dishwasher is usually situated at the bottom of the unit. It’s designed to capture food particles and prevent them from circulating back onto your dishes.
- Access the Filter: In most cases, you can move the spray arm out of the way, allowing you to access the filter housing. The filter housing can often be lifted by pulling it up.
- Remove and Clean the Filter: Once you have access to the filter, gently flip it over. You should be able to slide off the filter itself. To clean it, rinse the filter with warm water and use a mild soap along with a gentle sponge or brush to remove any accumulated debris and grime.
- Reassemble and Reinstall: After cleaning, reassemble the filter and ensure it’s correctly positioned. Then, reinstall it in the dishwasher, making sure it’s securely in place.
By following these steps, you can effectively address error code E22 and ensure that your Thermador dishwasher operates at its best. Regular maintenance of the filter, including cleaning it after each use or as needed, can prevent this error from recurring and maintain the efficiency of your dishwasher.
In conclusion, while Thermador dishwashers are known for their exceptional performance, even they may encounter occasional issues like error code E22. With the right knowledge and a little maintenance, you can quickly resolve this error and continue to enjoy the convenience of your Thermador dishwasher
Thermador Dishwasher Error Code E18
In the world of household appliances, Thermador dishwashers are renowned for their quality and cutting-edge features. However, even the best appliances can encounter issues. One of the most common challenges that Thermador dishwasher users may face is the E18 error code. This code typically signals a problem related to water level or water flow in the dishwasher.
Understanding the E18 Error Code
When your Thermador dishwasher displays the E18 error code, it’s essential to recognize that this code usually indicates one of two primary issues:
- Low Water Level: The dishwasher is not receiving an adequate amount of water, which can hinder its ability to perform a wash cycle effectively.
- Water Flow Obstruction: Something is obstructing the water flow, preventing it from reaching the dishwasher’s components properly.
Troubleshooting the E18 Error:
Here’s how to address the E18 error code step by step:
- Safety First: Unplug the dishwasher and ensure that the power is turned off before proceeding with any troubleshooting.
- Check the Inlet Hose: Examine the inlet hose for any kinks, bends, or damage. A kinked hose can restrict water flow to the dishwasher. Straighten the hose if necessary.
- Ensure Sufficient Water Supply: Verify that your water supply delivers at least 10 liters of water per minute. Inadequate water pressure can trigger the E18 error.
- Cleaning the Inlet Hose Filter: If the error persists, it’s time to clean the filter in the inlet hose. A clogged filter can obstruct water flow. The filter location may vary based on your dishwasher model, so refer to your user manual for specific instructions.
For a visual guide on how to clean the inlet hose filter and address the E18 error, you can watch instructional videos available online. These videos can provide a clear, step-by-step demonstration of the process, ensuring that you can perform the task correctly.
While the E18 error code on your Thermador dishwasher can be frustrating, addressing it is often a manageable task. By following the steps mentioned above and referring to your user manual, you can troubleshoot the issue and restore your dishwasher’s functionality. Remember to prioritize safety by disconnecting the power before making any checks or adjustments.
Thermador Dishwasher Error Code E15
Error Code E15 typically occurs when water is detected in the base of the dishwasher. This water accumulation may result from a leak somewhere in your kitchen, with water finding its way under the dishwasher. The appliance is equipped with a safety switch that triggers when it senses water in the base, activating a system designed to prevent further leakage.
How to Address Error Code E15:
If your Thermador dishwasher displays Error Code E15, it’s essential to take prompt action. Here are the steps to address this issue:
- Turn Off Water Supply: First, immediately turn off the water inflow to your dishwasher to prevent any further water from entering the appliance.
- Unplug the Dishwasher: Safely unplug the dishwasher to disconnect it from the power source.
- Remove Door Panel and Kickplates (if possible): If you are comfortable doing so, removing the dishwasher’s door panel and kickplates can provide access to the base where the water has collected.
- Remove Excess Water: To remove the water in the base, you can use a wet vacuum hose or a turkey baster. Carefully suck up any visible water until the base is mostly dry.
- Promote Drying: To ensure that all moisture is eliminated, run a fan and dehumidifier near the dishwasher for approximately 24 hours. This helps prevent any residual moisture from causing further issues.
When to Seek Professional Assistance:
While some homeowners may feel comfortable addressing Error Code E15 as a DIY project, others may prefer to consult a professional technician, especially if they are uncertain about removing panels or if the problem persists. A skilled technician can thoroughly inspect the dishwasher, identify the source of the water, and make any necessary repairs to prevent future occurrences of E15.
In summary, Thermador Dishwasher Error Code E15 serves as a vital warning system to protect your kitchen and home from potential water damage. By following the outlined steps and seeking professional assistance when needed, you can address this issue effectively and keep your Thermador dishwasher running smoothly. Your kitchen can continue to be the efficient, well-organized space you’ve come to rely on.
Thermador Dishwasher Error Code E12
The water used to wash your dishes contains minerals. As the water runs through the Thermador dishwasher, traces of the minerals are left behind. Overtime, this results in limescale buildup in the dishwasher’s heat pump and can cause blockages or interfere with the normal flow of water through the appliance. If you have hard water, meaning your water has especially high levels of minerals, and you don’t use softener salt, the chance and frequency of the limescale buildup occurring is higher.
Using a commercial descaling product to fix the Thermador dishwasher error code 12 is easy. Bosch is the parent company of Thermador and they make their own dishwasher descaler. Once you have the cleaning product, just follow these steps:
- Empty the dishwasher. Make sure there is not detergent in the dishwasher.
- Start the hottest and longest cycle available on your machine.
- After 30 minutes, open up the dishwasher and add one box or packet of the descaler to the bottom of the dishwasher.
- Close the dishwasher and let the cycle complete.
- Once done, run another wash cycle to rinse the machine. This time do not use any detergent or descaler.
Thermador Refrigerator Interior Lighting Issues
Thermador Refrigerator Light Assembly
The light assembly might be defective. Some manufacturers don’t sell the light assembly components separately, and instead require you to purchase the light assembly.
Thermador Refrigerator Light Bulb
The light bulb might be out. Replace the light bulb before replacing any of the other parts associated with the light bulb.
Thermador Refrigerator Dispenser Control Board
While it’s not a likely cause, a defective dispenser control board could be responsible for a dispenser light not working. You can inspect the board for signs of burning or a shorted-out component. You can also use a multimeter to determine if the board is sending voltage to the dispenser light’s plug-in connecter. If no voltage is present, you’ll know the board is defective and will need to be replaced.
Thermador Refrigerator Light Switch
To determine if the light switch is defective, use a multimeter to test it for continuity. If the light switch does not have continuity, replace it.
Thermador Refrigerator Door Switch
To determine if the door switch is defective, use a multimeter to test it for continuity. If the door switch does not have continuity when activated, replace it.
Thermador Refrigerator Light Socket
To determine if the light socket is defective, use a multimeter to determine if the socket is getting power. If the socket is getting power, but the light bulb won’t work, this indicates that the light socket is defective. If the light socket is defective, replace it.
Thermador Refrigerator Main Control Board
While it’s not a likely cause, a defective main control board could be responsible for a refrigerator light not working. You can inspect the board for signs of burning or a shorted-out component. You can also use a multimeter to determine if the board is sending voltage to the light socket or plug-in connecter. If no voltage is present, you’ll know the board is defective and will need to be replaced.
Thermador Refrigerator Light Board
First, ensure that the light board is receiving the proper amount of voltage. If the light board is receiving sufficient voltage, but the refrigerator light will not work, replace the light board.
Door opened too long
On most newer refrigerators, if the door is opened for an extended period of time the control board will shut the light off. Close and open the door to turn the light back on.
Thermador Refrigerator Control Board
While it’s not a likely cause, a defective control board could be responsible for a refrigerator light not working. You can inspect the board for signs of burning or a shorted-out component. You can also use a multimeter to determine if the board is sending voltage to the light socket or plug-in connecter. If no voltage is present, you’ll know the board is defective and will need to be replaced.
Thermador Refrigerator LED Light
The most likely cause for a refrigerator light not working is the LED light has burned out. You can confirm the light is defective by using a multimeter to test for voltage present at the LED light plug-in wire connecter. If sufficient power is reaching the connecter, you’ll know the LED light itself is faulty and will need to be replaced.
Thermador Refrigerator Faulty Thermostats
Faulty thermostats in a Thermador refrigerator can lead to temperature control issues and impact the freshness of your stored food. Here’s how to identify and address problems with faulty thermostats:
Identifying Faulty Thermostats:
- Temperature Inaccuracy: If your refrigerator consistently fails to maintain the desired temperature or if you notice significant temperature fluctuations, it could indicate a problem with the thermostat.
- Food Spoilage: Food may spoil more quickly than expected due to incorrect temperature settings caused by a faulty thermostat.
- Frozen Items: On the other hand, if your thermostat is stuck in the cooling position, items in the refrigerator may freeze.
Possible Solutions for Faulty Thermostats:
- Calibrate the Thermostat: Some thermostats allow for calibration. Refer to your refrigerator’s user manual for instructions on adjusting the thermostat settings to achieve the desired temperature.
- Check for Obstructions: Ensure that there are no obstructions near the thermostat sensor, which could affect its accuracy.
- Thermostat Replacement: If calibration and checking for obstructions do not resolve the issue, it may be necessary to replace the faulty thermostat. Contact a professional technician to handle thermostat replacement, as it involves electrical components and precise calibration.
- Regular Maintenance: Schedule regular maintenance with a professional technician to ensure your refrigerator’s thermostat and other components are functioning correctly.
By addressing these issues and following the suggested solutions, you can help rectify problems with faulty thermostats in your Thermador refrigerator, ensuring it maintains the ideal temperature for food preservation. If thermostat issues persist, contacting a professional appliance repair technician is the best course of action to diagnose and resolve the problem accurately.
Thermador Refrigerator Inadequate Cooling
Condenser Coils are Dirty
The condenser coils are usually located under the refrigerator. They dissipate heat as refrigerant passes through them. If the condenser coils are dirty, they won’t dissipate the heat effectively. As debris builds up on the coils, the refrigerator becomes less efficient, causing the refrigerator to work harder to cool down. If the coils are significantly dirty, the refrigerator will not be able to maintain the proper temperature. Check the condenser coils to determine if they are dirty—if the condenser coils are dirty, clean them.
Freezer or refrigerator temperature is set too high
Verify the freezer temperature is set between 0 and 5 degrees Fahrenheit (-18 to -15 Celsius). Verify the refrigerator temperature is set between 34 and 40 degrees Fahrenheit (1 to 5 Celsius). After reseting the temperature wait 24 hours for the temperature to adjust appropriately.
Thermador Refrigerator Condenser Fan Motor
The condenser fan motor draws air though the condenser coils and over the compressor. If the condenser fan motor is not working properly, the refrigerator won’t cool properly. To determine if the fan motor is defective, first check the fan blade for obstructions. Next, try turning the fan motor blade by hand. If the blade does not spin freely, replace the condenser fan motor. If no obstructions are present and the fan blade spins freely, use a multimeter to test the fan motor for continuity. If the condenser fan motor does not have continuity, replace it.
Thermador Refrigerator Evaporator Fan Motor
The evaporator fan motor draws air over the evaporator (cooling) coils and circulates it throughout the refrigerator and freezer compartments. Some refrigerators have more than one evaporator fan motor. On refrigerators with only one evaporator, the evaporator is located in the freezer compartment. If the evaporator fan is not working, it will not circulate the cold air to the refrigerator compartment. If this occurs, the freezer may still get cold, while the refrigerator will not get cold. To determine if the evaporator fan motor is defective, try turning the fan blade by hand. If the fan blade does not turn freely, replace the fan motor. Additionally, if the motor is unusually noisy, replace it. Finally, if the motor does not run at all, use a multimeter to test the motor windings for continuity. If the windings do not have continuity, replace the evaporator fan motor.
Thermador Refrigerator Door Gasket
A refrigerator door gasket should form an airtight seal around the appliance’s frame to keep the cold air in and the warm air out. If the door gasket is twisted or torn, gaps can form that will allow warm air in, resulting in the refrigerator not cooling properly. Inspect the door gasket for any damage and replace with a new one if necessary.
Incoming Power Problem
Ensure plug is tightly pushed into electrical outlet and outlet is supplying power. Check fuses or circuit breaker if needed. It is best to have the refrigerator on a seperate dedicated circuit. If the refrigerator is connected to a ground fault receptacle it may need to be plugged into a regular receptacle. Using a ground fault receptacle for a refrigerator is not recommended.
Thermador Refrigerator Damper Control Assembly
On many refrigerator models, a damper control assembly is used to control the air flow from the freezer compartment to the refrigerator compartment to maintain the appropriate air temperature. If a refrigerator is not cooling properly, it’s possible the damper door is stuck closed. Inspect the damper control assembly for any malfunction and replace it with a new one if necessary.
Sealed System Problem
If all the refrigeration components seem to be working, but the refrigerator is not cooling properly there may be a restriction or leak in the refrigeration system. To determine this, you will need to remove the evaporator cover and observe the frost pattern on the coil. Note: The compressor, condenser and evaporator fans should all be running, and the condenser coil should be clean and have good air flow. There should be light frost on most of the coil. If the coil has frost or ice buildup in only one section, there is likely a restriction or leak in the system. This repair is expensive (maybe cost prohibitive) and should be diagnosed and repaired by a qualified technician.
Thermador Refrigerator Start Relay
The start relay works in conjunction with the start winding to start the compressor. If the start relay is defective, the compressor may sometimes fail to run or may not run at all. As a result, the refrigerator will not be cold enough. To determine if the start relay is defective, use a multimeter to test it for continuity between the run and start terminal sockets. If the start relay does not have continuity between the run and start terminal sockets, replace it. In addition, if the start relay has a burnt odor, replace it.
Thermador Refrigerator Control Board
The control board might be defective. However, this is almost never the cause. Before replacing the control board, test all of more commonly defective parts. If none of the other components are defective, consider replacing the control board.
Thermador Refrigerator Temperature Control Thermostat
The temperature control thermostat directs voltage to the compressor, evaporator fan motor, and condenser fan motor (if applicable). If the temperature control thermostat is not working properly, it may prevent the refrigerant system from running. To determine if the thermostat is defective, rotate the thermostat from the lowest setting to the highest setting and listen for a click. If the thermostat clicks, it is not likely defective. If the thermostat does not click, use a multimeter to test the thermostat for continuity. If the temperature control thermostat does not have continuity at any setting, replace it.
Thermador Refrigerator Inverter Board
The inverter board is the component that cycles the compressor on and off. You can use a multimeter to test if power is reaching the compressor. If no power is reaching the compressor, the inverter board is likely defective and should be replaced.
Thermador Refrigerator Defrost Heater Assembly
The defrost heater assembly turns on several times throughout the day to melt away any frost that may have accumulated on the evaporator coils. If the defrost heater assembly is defective, the defrost system will not work, and frost will continue to accumulate on the evaporator coils. This will result in the refrigerator not cooling properly. To determine if the defrost heater is defective, use a multimeter to test it for electrical continuity. If the defrost heater does not have continuity, replace it.
Thermador Refrigerator Start Capacitor
The start capacitor provides a boost of power to the compressor during start-up. If the start capacitor isn’t working, the compressor may not start. As a result, the refrigerator will not cool. To determine if the start capacitor is defective, test it with a multimeter. If the start capacitor is defective, replace it.
Thermador Refrigerator Defrost Thermostat
The defrost thermostat monitors the temperature of the evaporator coils. When the coils drop below a set temperature, the thermostat contacts close to allow power to flow to the defrost heater during the defrost cycle. In the defrost cycle, the defrost heater melts away any frost that may have accumulated on the evaporator coils. If the defrost thermostat is defective, the defrost heater may not activate. This will cause the evaporator coils to frost over resulting in the refrigerator not cooling properly. To determine if the defrost thermostat is defective, use a multimeter to test it for electrical continuity. If the defrost thermostat does not have continuity when it reaches the low temperature of its operating range, replace it.
Thermador Refrigerator Thermistor
The thermistor monitors the refrigerator temperature and sends the temperature reading to the control board. The control board regulates power to the compressor and evaporator fan based on the thermistor readings. If the thermistor is defective, the compressor and evaporator fan may not run when necessary. As a result, the refrigerator will not be cold enough. To determine if the thermistor is defective, test it with a multimeter. The thermistor resistance should change in conjunction with the refrigerator temperature. If the thermistor resistance does not change, or the thermistor does not have continuity, replace the thermistor.
Thermador Refrigerator Temperature Control Board
The temperature control board provides voltage to the compressor and fan motors. If the temperature control board is defective, it will stop sending voltage to the cooling system. However, this is not a common occurrence. Control boards are often misdiagnosed—before replacing the control board, first test all of the more commonly defective components. If none of the other components are defective, consider replacing the temperature control board.
Thermador Refrigerator Compressor
The compressor is a pump which compresses the refrigerant and circulates the refrigerant through the evaporator and condenser coils. If the compressor is not working, the refrigerator won’t cool. However, this is rarely the case. Before replacing the compressor, first check all of the more commonly defective parts. If you have determined that all of the other components are working properly, check the compressor. Use a multimeter to test the continuity between the electrical pins on the side of the compressor. If there is an open circuit, the compressor is likely defective. If the compressor is defective, it must be replaced by a licensed technician.
Thermador Refrigerator Main Control Board
The main control board might be defective. However, this is almost never the cause. Before replacing the main control board, test all of more commonly defective parts. If none of the other components are defective, consider replacing the main control board.
Thermador Refrigerator Start Device
A start device, like a start relay, works in conjunction with the start winding to start the compressor. If the start device is defective, the compressor may sometimes fail to run or may not run at all. As a result, the refrigerator will not be cold enough. To determine if the start device is defective, use a multimeter to test it for continuity between the run and start terminal sockets. If the start device does not have continuity between the run and start terminal sockets, replace it. In addition, if the start device has a burnt odor, replace it.
Thermador Refrigerator Frost Accumulation
Thermador Freezer Defrost Timer
The defrost timer turns on the defrost heater several times throughout the day to melt any frost that may have accumulated on the freezer evaporator coils. If the defrost heater does not turn on, frost will continue to accumulate on the evaporator coils, and the coils will eventually frost over. In order for the defrost timer to turn on the defrost heater, the defrost timer must advance into the defrost cycle. If the defrost timer is not advancing properly, the defrost heater won’t turn on. To determine if the timer is defective, slowly turn the timer with a screwdriver or by hand. Turn the timer until it clicks. When the timer clicks, the compressor and fans will shut off. If the defrost thermostat and heater are working properly, the heater will turn on. If the heater turns on, this indicates that the timer is defective and must be replaced.
Thermador Freezer Defrost Heater Assembly
The defrost heater turns on several times throughout the day to melt away any frost that may have accumulated on the freezer evaporator coils. If the defrost heater does not turn on, frost will continue to accumulate on the evaporator coils, and the coils will eventually frost over. To determine if the defrost heater is at fault, use a multimeter to test the defrost heater for continuity. If the defrost heater does not have continuity, replace it.
Thermador Freezer Defrost Thermostat
The defrost heater turns on several times throughout the day to melt away any frost that may have accumulated on the freezer evaporator coils. Before the defrost heater turns on, the defrost thermostat must sense that the evaporator coils are cold enough. If the coils are cold enough, the defrost thermostat will allow the defrost heater to turn on. (Usually, the temperature of the coils must be below 30 degrees Fahrenheit.) If the thermostat is defective, the defrost heater won’t turn on, causing the evaporator coils to frost over. To determine if the defrost thermostat is at fault, use a multimeter to test the thermostat for continuity. If the defrost thermostat does not have continuity, replace it.
Thermador Freezer Door Gasket
The door gasket prevents air from leaking into or out of the freezer. If the door gasket is torn or not creating a reliable seal, or if the freezer is not shut tightly, humid air can leak into the freezer. When this humid air passes over the cold evaporator coils, it condenses and freezes on the coils. If humid air is continually leaking into the freezer, the evaporator coils ice over too quickly, and the defrost cycle isn’t able to keep up. To determine if the gasket is creating a reliable seal, close the freezer door on a dollar bill and try to pull the dollar bill out of the freezer door. If the dollar bill sticks in place, the gasket is creating a good seal. If the dollar bill slides out or falls out, the gasket has a leak. Repeat this procedure all the way around the refrigerator door. If, at any point, the dollar bill does not stick, the gasket is defective. If the door gasket is defective, replace it.