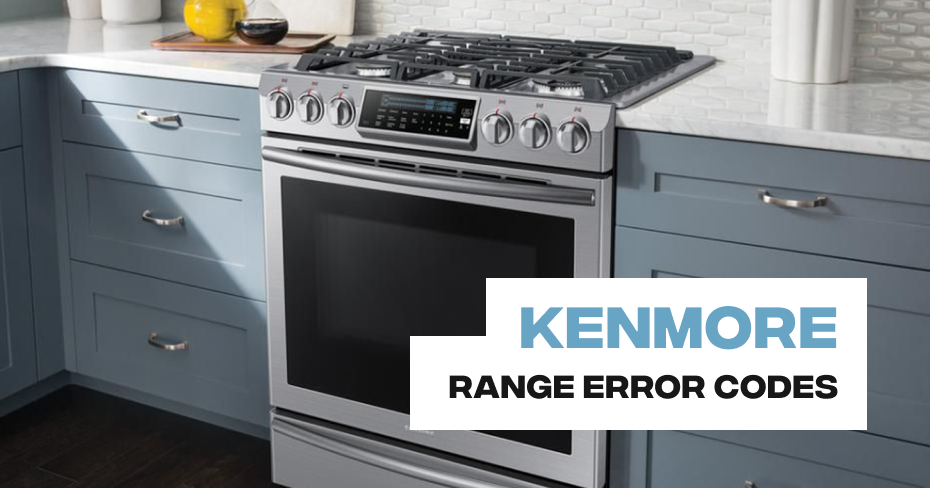
Kenmore Range Error Code F1, F2 or F8
Kenmore ranges are known for their reliability and cooking efficiency. However, from time to time, they may throw error codes like F1, F2, or F8, causing concerns for homeowners. One common cause of these error codes is a defective upper oven temperature sensor. In this article, we’ll delve into these error codes and guide you on how to address them effectively.
Understanding Error Codes F1, F2, and F8:
- F1: This error code typically indicates a fault in the oven’s temperature sensor circuit. It could be caused by a defective temperature sensor or a wiring issue.
- F2: F2 error codes usually signify problems with the oven’s temperature sensor. It suggests that the sensor is sending incorrect temperature readings to the control board.
- F8: An F8 error code often points to a malfunction in the oven’s cooling fan motor or another component related to the cooling system.
Identifying the Issue:
If you encounter any of these error codes, it’s essential to investigate the problem further. For instance, when dealing with an F1, F2, or F8 error, you might want to focus on the upper oven temperature sensor. Here’s how to go about it:
- Safety First: Always ensure your safety by unplugging the range and taking precautions when working on electrical components.
- Resistance Measurement: Using a multimeter, measure the resistance of the upper oven temperature sensor. At room temperature (around 77 degrees F or 25 degrees C), the sensor should read approximately 1,090 ohms. If the measured resistance differs by more than 100 ohms from this value, it’s a clear indication that the sensor is faulty.
- Sensor Replacement: If the upper oven temperature sensor is indeed defective, it’s recommended to replace it. A faulty sensor can lead to incorrect temperature readings and trigger error codes. Replacing it will help ensure your Kenmore range operates accurately.
Kenmore Range Error Codes
Renowned for their quality and reliability, Kenmore ranges are a staple in many homes. However, like any appliance, Kenmore ranges can experience issues, including error codes that may leave you scratching your head. When faced with Kenmore Range Error Codes, you need a solution, and that’s where we come in.
At Appliance Repair Los Angeles, we specialize in repairing and servicing a wide range of appliances, including Kenmore ranges. Our team of highly trained and experienced technicians is well-equipped to tackle any Kenmore Range Error Codes you may encounter. Whether it’s a code related to temperature, sensors, ignition, or any other issue, we’ve got you covered.
| Error Code |
Causes |
| F1, F2 or F8 |
Defective upper oven temperature sensor Learn More |
| F3 |
Stuck key Learn More |
| F4, F5 or F18 |
Defective lower oven temperature sensor Learn More |
| F6 |
Upper oven too hot Learn More |
| F9 |
Upper oven not heating Learn More |
| F10 |
Upper oven door lock failure Learn More |
| F11 |
Communications error between the oven control board and cooktop control board Learn More |
| F16 |
Lower oven too hot Learn More |
| F19 |
Lower oven not heating Learn More |
| F20 |
Lower oven door lock failure Learn More |
Don’t let Kenmore Range Error Codes disrupt your cooking routine. Contact us at 323-792-1970 to schedule an appointment with our skilled technicians. We’re dedicated to providing efficient and reliable solutions, ensuring your Kenmore range serves you well for years to come.
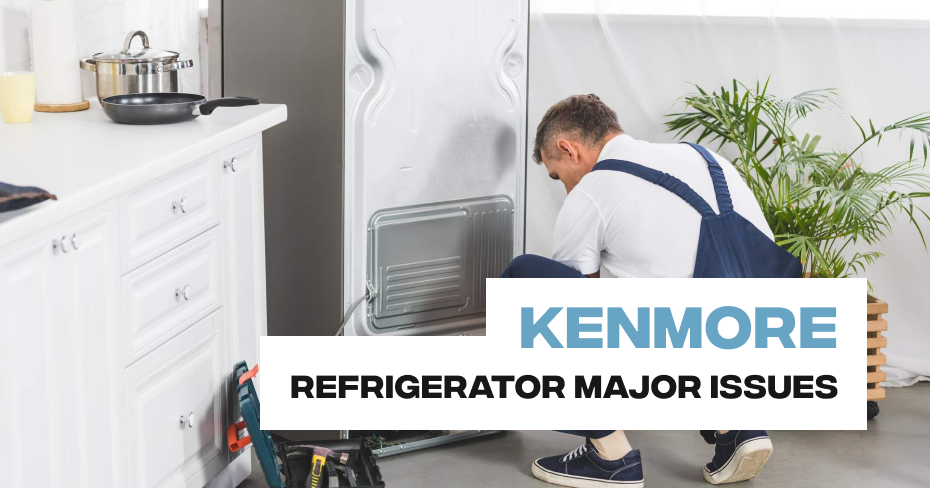
Kenmore Refrigerator Not Running
If your Kenmore refrigerator is not running, it can be a cause for concern, as this essential appliance plays a crucial role in keeping your food fresh and cold. When you encounter this issue, there are several potential causes and DIY solutions to consider:
- Power Supply Issues: Verify that the refrigerator is properly plugged in, and check if there is power at the electrical outlet. Ensure that the circuit breaker or fuse that controls the refrigerator’s power is not tripped or blown.
- Defective Thermostat: A malfunctioning thermostat may not trigger the compressor to run, leading to the refrigerator not cooling.
- Faulty Start Relay: The start relay is responsible for starting the compressor. If it’s defective, the compressor may not engage.
- Condenser Coils Cleaning: Dust and debris accumulation on the condenser coils can lead to overheating and cause the refrigerator to shut down.
- Compressor Issues: If the compressor is faulty or fails to start, the refrigerator won’t run.
DIY Solutions:
- Check Power Supply: Ensure the refrigerator is properly plugged in and that the electrical outlet is functional. Check the circuit breaker or fuse box to make sure the circuit is not tripped or a fuse is blown. Reset or replace as needed.
- Reset the Refrigerator: Some issues can be resolved by resetting the refrigerator. Unplug it from the power source for a few minutes and then plug it back in. This may reset the system and resolve minor issues.
- Inspect the Thermostat: Check the thermostat settings to ensure they are correctly adjusted. If you suspect a faulty thermostat, it may need to be replaced. Consult your user manual for guidance on thermostat replacement.
- Clean the Condenser Coils: Regularly clean the condenser coils at the back or underneath the refrigerator to improve heat dissipation and cooling efficiency. Dust and debris can accumulate over time, hindering performance.
- Inspect the Start Relay: Examine the start relay for any visible damage. If it’s found to be defective, it may need replacement. This is a more advanced repair, and it’s recommended to consult your user manual or seek professional assistance.
- Seek Professional Help: If the compressor is suspected to be the issue, or if the problem persists after attempting the above solutions, it’s advisable to contact a professional appliance repair technician. Compressor issues require specialized knowledge and tools to address.
Addressing the issue of a Kenmore refrigerator not running promptly is essential to prevent food spoilage and to ensure the appliance’s continued operation. Depending on the cause, you may be able to resolve the problem yourself, but for more complex issues, it’s recommended to seek professional assistance.
Kenmore Refrigerator Door Seal Problems
01 – Kenmore Refrigerator Door Gasket
A twisted or worn gasket can keep the door from closing properly. Inspect the door gasket for kinks or twists. You can use a hair dryer to try smoothing out the kinks. If the door gasket is damaged it will need to be replaced.
02 – Kenmore Refrigerator Door Catch
The door cam helps the door to close. If the door cam is worn or broken the door may not close properly. Inspect the door cam for damage, and replace it if needed.
03 – Kenmore Refrigerator Door Support
A refrigerator door support is often used on French Door models to flip a mullion heater flap to seal the gap between the doors. If the door support is damaged or misaligned, the mullion heater flap may not be positioned appropriately for the door or doors to close completely. Inspect the support for damage and replace if necessary.
04 – Kenmore Refrigerator Mullion Heater
French door refrigerators will often use a mullion heater flap which flips open as the two main doors are closed to provide a proper seal. If the mullion heater is misaligned or damaged, it can prevent the doors from closing properly. Inspect the mullion heater for any damage and replace it with a new one if necessary.
05 – Kenmore Refrigerator Door Guide
A door guide is often used on French door refrigerators to assist in flipping open a mullion heater flap to provide a seal between the two main doors. If the guide is damaged or misaligned, the flap may not engage accurately and prevent the doors from closing properly. Inspect the door guide (often attached to the inner liner at the top of the frame) and replace it with a new one if necessary.
06 – Obstructed Door
The door bin may be hitting the shelf causing the door to stay slightly open. Food Items in the door bins and shelves can also keep the door from closing. Make sure the shelves and door bins are in the proper locations. Avoid overloading the door bins and shelves.
07 – Kenmore Refrigerator Closing Cam
A refrigerator door closing cam allows the door to rest in place in the open position and to close securely on its own when the door is swung shut. If a refrigerator door does not close properly, it’s likely the closing cam has worn out and will need to be replaced.
08 – Kenmore Refrigerator Door Hinge
If the door hinge is bent or misaligned the door can rub on the liner. If the door gasket is catching and twisting on the hinge side, a shim can be added between the hinge and frame. This will add more space to help keep the gasket from catching on the frame when the door is closed.
09 – Kenmore Refrigerator Door Stop
A damaged refrigerator door stop can prevent the door from closing properly. Inspect the component for signs of wear and replace if necessary.
10 – Kenmore Refrigerator Hinge
A damaged or bent hinge could cause the refrigerator door to be misaligned and not close properly. Inspect all hinges for defects and replace one or more as necessary.
11 – Kenmore Refrigerator Closing Mechanism
A refrigerator door closing mechanism allows the door to rest in place in the open position and to close securely on its own when the door is swung shut. If a refrigerator door does not close properly, it’s likely the closing mechanism has worn out and will need to be replaced.
12 – Kenmore Refrigerator Drawer Slide Rail
A refrigerator drawer slide rail is the component that allows a drawer to be pulled out and pushed back in smoothly. If the rail is damaged or misaligned, the drawer may not be able to be pushed in all the way, preventing a refrigerator door from closing properly. Inspect the drawer slide rail for any damage and replace if necessary.
Kenmore Refrigerator Broken Lights or Display
01 – Kenmore Refrigerator Light Assembly
The light assembly might be defective. Some manufacturers don’t sell the light assembly components separately, and instead require you to purchase the light assembly.
02 – Kenmore Refrigerator Light Bulb
The light bulb might be out. Replace the light bulb before replacing any of the other parts associated with the light bulb.
03 – Kenmore Refrigerator Dispenser Control Board
While it’s not a likely cause, a defective dispenser control board could be responsible for a dispenser light not working. You can inspect the board for signs of burning or a shorted-out component. You can also use a multimeter to determine if the board is sending voltage to the dispenser light’s plug-in connecter. If no voltage is present, you’ll know the board is defective and will need to be replaced.
04 – Kenmore Refrigerator Light Switch
To determine if the light switch is defective, use a multimeter to test it for continuity. If the light switch does not have continuity, replace it.
05 – Kenmore Refrigerator Door Switch
To determine if the door switch is defective, use a multimeter to test it for continuity. If the door switch does not have continuity when activated, replace it.
06 – Kenmore Refrigerator Light Socket
To determine if the light socket is defective, use a multimeter to determine if the socket is getting power. If the socket is getting power, but the light bulb won’t work, this indicates that the light socket is defective. If the light socket is defective, replace it.
07 – Kenmore Refrigerator Main Control Board
While it’s not a likely cause, a defective main control board could be responsible for a refrigerator light not working. You can inspect the board for signs of burning or a shorted-out component. You can also use a multimeter to determine if the board is sending voltage to the light socket or plug-in connecter. If no voltage is present, you’ll know the board is defective and will need to be replaced.
08 – Kenmore Refrigerator Light Board
First, ensure that the light board is receiving the proper amount of voltage. If the light board is receiving sufficient voltage, but the refrigerator light will not work, replace the light board.
09 – Door opened too long
On most newer refrigerators, if the door is opened for an extended period of time the control board will shut the light off. Close and open the door to turn the light back on.
10 – Kenmore Refrigerator Control Board
While it’s not a likely cause, a defective control board could be responsible for a refrigerator light not working. You can inspect the board for signs of burning or a shorted-out component. You can also use a multimeter to determine if the board is sending voltage to the light socket or plug-in connecter. If no voltage is present, you’ll know the board is defective and will need to be replaced.
11 – Kenmore Refrigerator LED Light
The most likely cause for a refrigerator light not working is the LED light has burned out. You can confirm the light is defective by using a multimeter to test for voltage present at the LED light plug-in wire connecter. If sufficient power is reaching the connecter, you’ll know the LED light itself is faulty and will need to be replaced.
Kenmore Refrigerator Faulty Ice Maker
A faulty ice maker in your Kenmore refrigerator can be quite inconvenient, especially if you rely on it for ice production. If your Kenmore refrigerator’s ice maker is not working as it should, here are some common causes and DIY solutions to address the issue:
Causes:
- Water Supply Issues: If there are problems with the water supply to the refrigerator, it can affect ice production. Check for water line kinks or blockages.
- Frozen Water Fill Tube: A frozen water fill tube can block water from entering the ice maker. This may happen if the temperature is too low in the freezer or if the tube is obstructed.
- Damaged or Clogged Water Inlet Valve: A damaged or clogged water inlet valve can prevent water from entering the ice maker.
- Malfunctioning Ice Maker Module: Issues with the ice maker’s internal module can result in no ice production or irregular ice cube sizes.
DIY Solutions:
- Check Water Supply: Verify that the water supply to the refrigerator is working correctly. Ensure that the water line is not kinked or blocked. If you suspect a water supply issue, consult your user manual for guidance on inspecting and repairing the water line.
- Inspect Water Fill Tube: Examine the water fill tube for ice blockages. If it’s frozen, you may need to thaw it. Ensure that the freezer temperature is set to an appropriate level. If the tube is obstructed, carefully remove the blockage.
- Examine the Water Inlet Valve: Check the water inlet valve for any damage or debris. If it’s clogged, consider cleaning or replacing it as needed. Refer to your user manual for instructions.
- Test the Ice Maker Module: Some Kenmore refrigerators allow you to manually test the ice maker module. Follow the instructions in your user manual to perform this test. If the module is faulty, it may need to be replaced.
- Replace the Water Filter: A clogged or old water filter can impact ice production. If your refrigerator has a water filter, consider replacing it regularly to ensure a consistent water supply.
If you’ve tried these DIY solutions and the ice maker issue persists, or if you’re uncomfortable with more advanced repairs, it’s recommended to contact a professional appliance repair technician. They can diagnose and address more complex problems with your Kenmore refrigerator’s ice maker and ensure it’s functioning correctly, providing you with a reliable source of ice.
Kenmore Refrigerator Inconsistent Temperatures
Inconsistent temperatures in your Kenmore refrigerator can lead to uneven cooling, potentially resulting in food spoilage. This issue may manifest as sections of the refrigerator being too cold while others are too warm. Here are some common causes and DIY solutions for dealing with inconsistent temperatures:
- Check and Clear Air Vents: Ensure that the air vents in both the refrigerator and freezer sections are not obstructed by food items. Proper airflow is essential for maintaining consistent temperatures. Rearrange the contents if necessary.
- Inspect the Door Seal: Carefully examine the door gasket for any visible damage or deformities. If you find any issues, consider replacing the gasket. To test the seal, close the door on a dollar bill, and if you can easily pull it out without resistance, the seal may need replacement.
- Adjust Thermostat Settings: Check the thermostat settings to ensure they are correctly adjusted. Refer to your refrigerator’s user manual for guidance on how to set the thermostat to the desired temperature.
- Monitor Overloading: Avoid overloading the refrigerator with too many items, as this can disrupt proper airflow and cooling. Consider removing unnecessary items or redistributing them to ensure even spacing.
- Regular Maintenance: Clean the condenser coils at the back or underneath the refrigerator to improve heat dissipation and cooling efficiency. Dust and debris can accumulate over time, hindering performance.
- Allow Hot Foods to Cool: Before placing hot or warm dishes in the refrigerator, allow them to cool down to room temperature. Hot items can raise the internal temperature and cause fluctuations.
If you’ve tried these DIY solutions and the issue persists, or if you’re uncomfortable with more advanced repairs, it’s advisable to contact a professional appliance repair technician. They can diagnose and address more complex problems with your Kenmore refrigerator’s cooling system to ensure consistent and reliable temperature control.
Kenmore Refrigerator Strange Noises
01 – Kenmore Refrigerator Fan Blade
If the refrigerator is noisy or loud, especially when one of the doors are opened, either the evaporator or condenser fan blade may be at fault. First, check out the evaporator fan blade in the freezer behind the back panel. Try turning it by hand. If the fan blade does not turn freely, check to see if the blade is rubbing against something or if something is caught in the blade. Additionally, check the condenser fan blade in the back underside of the refrigerator to determine if it has any obstructions.
02 – Low Water Pressure from House Supply
The home may have insufficient water pressure. The water inlet valve supplies water to the water dispenser. The water inlet valve requires a minimum of 20 psi to function properly. Check the water flow and test the pressure to determine if it is at least 20 psi.
03 – Kenmore Refrigerator Evaporator Fan Motor
When the evaporator fan motor in the freezer behind the rear panel fails, it often generates a lot of noise. This noise will be much louder when the refrigerator door is opened. If the evaporator fan is noisy, replace it.
04 – Kenmore Refrigerator Damper Control Assembly
On many refrigerator models, a damper control assembly is used to control the air flow from the freezer compartment to the refrigerator compartment to maintain the appropriate air temperature. The assembly accomplishes this by opening and closing a small door. As the damper control assembly ages, the action of opening and closing the damper door can become noisy or loud. If the damper control assembly has become increasing noisy, you can replace the old assembly with a new one.
05 – Refrigerator not level
If the refrigerator is not level it can vibrate or rattle. Ensure the unit is level and stable on the floor. Most refrigerators front legs or rollers are adjustable.
06 – Kenmore Refrigerator Ice Maker Assembly
If a refrigerator is making a loud noise near the ice maker when the unit is cycling, it’s likely that either the ice maker’s drive motor or motor module is beginning to fail. While some of the ice maker components, such as the drive motor or module, may be sold separately for select models, you may need to purchase and replace the entire ice maker assembly.
07 – Kenmore Refrigerator Condenser Fan Motor
There might be something caught in the condenser fan motor blade, or the condenser fan motor bearings might be defective. The condenser fan motor is usually located underneath the refrigerator near the back. Pull the refrigerator out from the wall and remove the rear access panel to access it.
08 – Kenmore Refrigerator Evaporator Fan Blade
If the refrigerator is noisy or loud, especially when one of the doors are opened, the evaporator fan blade may be at fault. Check out the evaporator fan blade in the freezer or refrigerator behind the back panel. Try turning it by hand. If the fan blade does not turn freely, check to see if the blade is rubbing against something or if something is caught in the blade. If the blade is damaged it will need to be replaced.
09 – Kenmore Refrigerator Condenser Fan Blade
If the refrigerator is noisy or loud, the condenser fan blade may be at fault. Check the condenser fan blade in the back lower section behind the panel to determine if it has any obstructions. Try turning it by hand. If the fan blade does not turn freely, check to see if the blade is rubbing against something or if something is caught in the blade. If the blade is damaged it will need to be replaced.
10 – Kenmore Refrigerator Compressor
If the noise is coming from the compressor, the compressor might be damaged internally. The compressor internal components can wear out over time generating more noise than normal. The compressor is usually located underneath the refrigerator near the back. Pull the refrigerator out from the wall and remove the rear panel to access it. Compressors often last for years after they become noisy. However, if your compressor is noisy, be aware that it is likely to fail. The compressor must be replaced by a licensed technician.
11 – Kenmore Refrigerator Water Inlet Valve
If the refrigerator is noisy or loud, particularly when the ice maker is filling, the water inlet valve might be at fault. The water inlet valve is an electrically-controlled valve that opens to supply water to the refrigerator dispenser and icemaker. Over time, mineral deposits can accumulate inside the valve and restrict the water flow. If the water inlet valve is noisy or loud, replace it. Do not attempt to repair the water inlet valve—disassembling the valve can cause the valve to fail.
Kenmore Refrigerator Excessive Frost or Ice Buildup
Excessive frost or ice buildup inside your Kenmore refrigerator can be a troublesome issue that affects its cooling efficiency and overall performance. This buildup can lead to various problems, including insufficient cooling and increased energy consumption. Here are some common causes and DIY solutions for dealing with excessive frost or ice buildup:
- Faulty Defrost System: The defrost system in your refrigerator includes components like the defrost timer, defrost heater, and defrost thermostat. When any of these components fail, it can lead to excessive frost buildup.
- Door Seal Issues: If the refrigerator’s door seal, also known as the gasket, is damaged or improperly sealed, warm air from the outside can enter the unit. When this warm air meets the cold air inside, it causes condensation and frost.
- Excess Moisture: Frequent door opening, leaving the door ajar, or storing hot or uncovered food can introduce excess moisture into the refrigerator. This moisture can condense and freeze, leading to ice buildup.
DIY Solutions:
- Manual Defrosting: If you notice significant frost buildup, unplug the refrigerator and allow it to thaw naturally. This may take several hours. Remove all food items from the freezer and refrigerator sections, and place towels inside to absorb any melting ice. Once defrosted, clean and dry the interior thoroughly.
- Check and Replace Defrost Components: If the frost problem persists, you may need to inspect and potentially replace defrost system components. This is a more advanced repair and may require a qualified technician. Consult your refrigerator’s user manual for guidance on accessing these components.
- Inspect the Door Seal: Carefully examine the door seal for any visible damage or deformities. If you find any, consider replacing the gasket. Ensure the door is properly aligned and closes securely. You can perform the “dollar bill test” to check the seal’s effectiveness. Close the door on a dollar bill, and if you can easily pull it out without resistance, the seal may need to be replaced.
- Control Moisture: Be mindful of preventing excess moisture in the refrigerator. Keep food covered, avoid leaving the door open for extended periods, and ensure hot items have cooled down before storing them.
- Maintain Proper Ventilation: Ensure that air vents inside the refrigerator and freezer are not obstructed by food items. Proper airflow can help prevent frost buildup.
If you’ve tried these DIY solutions and the problem persists or if you are uncomfortable with more advanced repairs, it’s recommended to contact a professional appliance repair technician. They have the expertise to diagnose and fix more complex issues with your Kenmore refrigerator’s defrost system, ensuring that it functions efficiently and frost-free.
Kenmore Refrigerator Leaking Water
Clogged or Freezing Defrost Drain
If the defrost drain is frozen, the water will overflow the drain trough and drip down to the bottom of the compartment. This water can eventually leak onto the floor. Check the defrost drain to determine if it is clogged or frozen. If the defrost drain is frozen, thaw the ice. In addition, flush the drain with hot water to ensure that it is clear of debris.
Kenmore Refrigerator Door Gasket
If a refrigerator is leaking water outside the appliance, it’s possible a door gasket is damaged. A door gasket that does not form a proper seal to the refrigerator frame will allow warm humid air to enter the refrigerator or freezer compartment. This can create condensation which can then leak out the gap between the gasket and frame onto the floor. You should inspect the door gasket for any tears or twists and replace the gasket if necessary.
Kenmore Refrigerator Water Tank Assembly
Inspect the water tank assembly for any leaks. Be aware that the leak may be very small and hard to find. If you discover a leak, replace the water tank. Do not attempt to repair the water tank—glue will not stick properly to the plastic of the tank.
Kenmore Refrigerator Water Inlet Valve
The water inlet valve opens to supply water to the dispenser and icemaker. If the water inlet valve is cracked or has a loose fitting, water will leak from the valve. Inspect the water inlet valve for cracks, and make sure that it is tightly secured to the water supply line.
Kenmore Refrigerator Water Filter Housing
Inspect the water filter housing for cracks. If you discover any cracks in the water filter housing, replace the housing.
Kenmore Refrigerator Water Filter Head
The water filter head might be cracked, or the seal may be torn or missing. Inspect the water filter housing for cracks. If you discover any cracks in the water filter housing, replace it.
Kenmore Refrigerator Water Line
If a refrigerator is leaking water behind the appliance, one of the water lines providing water to the dispenser or ice maker could be damaged. Over time, the plastic lines can become brittle and develop cracks. You should inspect the water line for any cracks or holes and replace the water line with a new one.
Kenmore Refrigerator Ice Maker Assembly
A refrigerator leaking water inside the freezer compartment could be caused by a damaged ice maker assembly such as a cracked ice tray. The ice maker may also not be aligned under the fill tube properly, allowing water to drip into the freezer compartment. Inspect the ice maker assembly for any damage and replace the ice maker if necessary.
Kenmore Refrigerator Hose Connector
If a refrigerator is leaking water behind the appliance, one of the water line hose connectors could be damaged. A hose connector is the component that joins two water lines together to provide a water supply to the dispenser or ice maker. Inspect the hose connectors for any cracks and replace if necessary.
Kenmore Refrigerator Drain Pan
Self-defrosting refrigerators are equipped with a drain pan. The drain pan collects the water that melts from the evaporator coils. In order to evaporate the water in the drain pan, the condenser fan blows warm air from the condenser coils across the top of the drain pan. Because the condenser fan evaporates the water from the drain pan, the drain pan does not have to be emptied. However, if the drain pan is cracked, it will leak water as the defrost cycle is running. Inspect the drain pan for cracks. If the drain pan is cracked, replace it.
Cracked or broken supply lines
Check to see if the water supply line to the refrigerator is cracked or broken, if applicable. Replace the line if necessary. You can shut the water off at the valve until the faulty line is replaced.
Kenmore Refrigerator Tube
Refrigerators will have drain tubes installed to guide condensation from the evaporator to a drain pan near the bottom of the appliance. If a drain tube is damaged or detached the condensation can leak onto the floor. Inspect any tubes for damage and replace if necessary.
Kenmore Refrigerator Water Filter
The water filter might be not fitted properly on the filter housing. If the water filter is not fitted properly, water may leak from the filter. Remove and reinstall the filter to ensure that it is fitted properly.