Kenmore Dryer Lint Accumulation
Lint accumulation in a Kenmore dryer is a common issue that can affect the appliance’s efficiency and safety. Here’s how to address lint buildup in your Kenmore dryer:
- 1. Clean the Lint Filter: After each drying cycle, remove and clean the lint filter. Lint tends to accumulate on the filter, reducing the dryer’s efficiency and posing a fire hazard.
- 2. Inspect the Dryer Vent: Periodically inspect the dryer vent, both inside the dryer and the vent duct leading outside. Lint can accumulate in the vent, restricting airflow. Disconnect the dryer from the power source, and then remove the vent duct to access the interior of the dryer and the vent. Use a lint brush or vacuum cleaner to remove lint buildup. Also, check the exterior vent for obstructions.
- 3. Clean the Exhaust Duct: Lint can accumulate in the exhaust duct leading from the dryer to the outside. Over time, this can restrict airflow and become a fire hazard. Disconnect the dryer from the power source and disconnect the duct. Clean it thoroughly using a lint brush or vacuum cleaner. Ensure it’s securely reattached afterward.
- 4. Remove Lint from Inside the Dryer: Lint can accumulate inside the dryer, even beyond the lint filter and exhaust duct. Consult your Kenmore dryer’s user manual for instructions on accessing and cleaning the interior components. Be sure to unplug the dryer before doing this. Carefully remove any accumulated lint from the interior.
- 5. Regular Maintenance: Perform regular maintenance to prevent lint accumulation. This includes cleaning the lint filter after every cycle, inspecting and cleaning the vent system periodically, and keeping the area around the dryer clean.
- 6. Professional Cleaning: For a thorough lint removal and dryer maintenance, consider scheduling professional cleaning services. A technician can disassemble the dryer, clean the internal components, and ensure it operates safely and efficiently.
Remember that lint buildup not only reduces your dryer’s efficiency but also poses a significant fire hazard. Regular maintenance and cleaning are essential to keep your Kenmore dryer running smoothly and safely. If you have concerns about cleaning the dryer or if lint accumulation is severe, consider seeking professional assistance.
Kenmore Dryer Burning Smell
Kenmore Dryer Lint Filter
Excessive lint build-up in the dryer can be a fire hazard. The element or burner can cause the lint to catch on fire. It is recommened to clean out the dryer and dryer venting at least once a year.
Kenmore Dryer Drive Belt
A drive belt that is stretched, worn or frayed can slip producing a burning smell. If the belt is damaged also check that the drum and idler pulley turn freely.
Kenmore Dryer Main Control Board
A dryer’s main control board controls the voltage being sent to all of the appliance’s electrical components. The board itself can become shorted and produce a burning smell. You should inspect the board for any burn marks or a shorted components and replace if necessary.
Kenmore Dryer Blower Belt
Some dryer models use a belt to run the blower. If the blower gets stuck or the blower belt is worn, loose and slipping, it can produce a burning smell. Confirm the blower turns freely and replace the belt if needed.
Kenmore Dryer Idler Pulley
The idler pulley keeps tension on the belt to prevent it from slipping. If the idler wheel is damaged or stops turning, the belt can slip on the drive pulley, producing a burning smell. If your idler pulley is damaged or doesn’t turn, you should replace it. Replacing the drive belt is also recommended.
Kenmore Dryer Drive Motor
The drive motor spins the drum to rotate the clothes. If one of the drum supports or idler pulley is binding up, the motor may stop or strain to keep turning. Sometimes the motor itself can have bad bearings making the motor shaft hard to turn. When this happens, the windings can overheat causing an electrical burning smell. If the motor hums but won’t start, or the windings smell burnt, the motor will likely need to be replaced.
Kenmore Dryer Drum Roller
If the smell coming from the dryer smells like burning rubber, it’s possible that a drum roller has worn out and the friction of the drum rubbing against the roller is producing the smell. Inspect the drum roller for wear and confirm the roller can spin freely. If one or more of the rollers are worn out, we recommend replacing all of the rollers at the same time as a preventative measure. (The axle can often be reused if it is in good condition. Clean the axle thoroughly before installing the new rollers.).
Kenmore Dryer Drum Support Roller & Axle
If the smell coming from the dryer smells like burning rubber, it’s possible that a drum support roller and axle has worn out and the friction of the drum rubbing against the roller is producing the smell. Inspect the support roller and axle for wear and confirm the roller can spin freely. If one or more of the rollers are worn out, we recommend replacing all of the rollers at the same time as a preventative measure. (The axle can often be reused if it is in good condition. Clean the axle thoroughly before installing the new rollers.).
Kenmore Dryer Control Board
The control board provides power to the various components of the dryer. If the control board receives a power surge, or a component fails, the control board can short-out causing a burning smell. Inspect the control board for burn marks. A burnt control board will need to be replaced.
Kenmore Dryer Terminal Block
The terminal block connects the power cord to the dryer’s electrical wiring. If the connections on the terminal block were not tight the terminal connectors can get hot, producing a burning smell. Inspect the terminal block for burnt connectors. If the terminal block is badly burnt it will need to be replaced.
Kenmore Dryer Timer
Contacts in the timer can become worn over time and fail to make good contact. When this happens, the contacts can overheat and arc, potentially producing a burning smell from the timer.
Excessive Lint in Dryer Cabinet
Over time lint will collect in the interior dryer cabinet, covering the dryer components. Lint that collects on the heater or burner assembly can ignite and cause a fire. Excessive lint can also cause other components like the motor, rollers and idler pulley to fail. The dryer cabinet should be checked and cleaned every 1 to 3 years depending on use.
Air Flow Problem
If the vent line is clogged or partially clogged, it will restrict the airflow through the dryer, substantially increasing the drying time and cabinet temperature and potentially causing a burning smell. To ensure proper dryer performance, you should clean your dryer’s venting system at least once per year.
Kenmore Dryer Control Panel Malfunctions
Control panel malfunctions in a Kenmore dryer can be frustrating, as they may prevent you from using the appliance effectively. If you’re experiencing control panel issues with your Kenmore dryer, here are some common problems and potential solutions:
- 1. Unresponsive Control Panel: Sometimes, the control panel may not respond when you press the buttons, making it impossible to select drying settings. Start by checking the power supply to the dryer. Ensure it’s properly plugged in and that the electrical outlet is working. If the issue persists, try resetting the dryer by unplugging it for a few minutes and then plugging it back in.
- 2. Difficulty Selecting Settings: If you find it challenging to select specific settings or if the display is malfunctioning, it may be due to control panel issues. Inspect the control panel for any visible damage or loose connections. If you notice any, you can attempt to reseat the connections, but be cautious and ensure the dryer is unplugged during this process.
- 3. Error Codes on the Display: Kenmore dryers may display error codes on the control panel to indicate specific issues. If you see an error code, it could help identify the problem. Consult your user manual to interpret the error code and follow the recommended troubleshooting steps to address the issue. Some error codes may require professional service.
- 4. Control Lock Feature: Some Kenmore dryers have a control lock feature that can be accidentally enabled, preventing you from making selections. Check if the control lock feature is engaged. Refer to your user manual for instructions on how to disable it.
- 5. Wiring and Connections: Loose or damaged wiring and connections can lead to control panel malfunctions. If you’re comfortable working with electronics, you can carefully inspect the wiring and connections within the control panel. Ensure that the dryer is unplugged before attempting any repairs.
- 6. Control Board Replacement: In some cases, control panel malfunctions may require replacing the control board. If the control board is the issue, it’s recommended to seek professional assistance, as this involves technical skills and knowledge.
If you’ve attempted these DIY solutions and the control panel issues persist, or if you’re unsure about diagnosing or repairing the problem, it’s best to contact a professional appliance repair technician. They have the expertise to handle control panel malfunctions and ensure your Kenmore dryer is working as it should.
Kenmore Dryer Drum Not Rotating
Kenmore Dryer Drive Belt
The drive belt is a very long, slender belt that wraps all the way around the dryer drum, around a tension pulley, and then around the drive motor pulley. Over time, the belt can break from normal use. If the belt is broken, the dryer won’t turn. To quickly determine if the belt is broken, reach into the dryer and turn the drum by hand. If the drum spins very easily, the belt is likely broken. Next, inspect the belt to confirm that it is broken. If the belt is broken, replace it.
Kenmore Dryer Timer
A dryer drum not turning could be caused by a faulty timer. However, this is very rarely the case. Before replacing the timer, check all the more commonly defective parts. If you determine that all of the other components are working properly, test the timer by using a multimeter and consulting the wiring diagram. If the timer is defective, replace it.
Kenmore Dryer Drum Roller
Most dryers have two drum rollers on the rear of the drum, and some dryers have two more rollers supporting the front of the drum. The rollers must spin freely to work properly. If the drum rollers are worn out, the dryer won’t turn properly. To determine if the support rollers are worn out, remove the belt from the dryer and try turning the drum by hand. If the drum does not rotate freely, check the support rollers for wear. If one or more of the rollers are worn out, we recommend replacing all of the rollers at the same time as a preventative measure. (The roller shaft can often be reused if it is in good condition. Clean the shaft thoroughly before installing the new rollers.)
Kenmore Dryer Blower Wheel
The dryer blower wheel is the component that circulates the air through the dryer drum. Since the drive motor that rotates the blower wheel will often drive the belt that turns the drum as well, an obstructed blower wheel could prevent the drum from turning. Inspect the blower wheel and housing for any obstruction and replace the component if necessary.
Kenmore Dryer Idler Pulley
Inspect the idler pulley for the dryer drum belt and make sure it spins freely on the shaft. If the idler pulley is stuck, worn or damaged, we recommend replacing the drum drive belt in addition to replacing the idler pulley.
Kenmore Dryer Control Board
A dryer’s control board controls the voltage being sent to all of the appliance’s electrical components. If the board is defective, it may interrupt voltage to the drive motor resulting in the drum not turning. You can inspect the board for signs of damage or a shorted component. You can also use a multimeter to test for voltage reaching the drive motor after reviewing the dryer’s wiring diagram.
Kenmore Dryer Main Control Board
A dryer’s main control board controls the voltage being sent to all of the appliance’s electrical components. If the board is defective, it may interrupt voltage to the drive motor resulting in the drum not turning. You can inspect the board for signs of damage or a shorted component. You can also use a multimeter to test for voltage reaching the drive motor after reviewing the dryer’s wiring diagram.
Kenmore Dryer Drum Support Roller & Axle
Most dryers have two drum rollers on the rear of the drum, and some dryers have two more rollers supporting the front of the drum. The rollers must spin freely to work properly. If the drum rollers are worn out or the axles are damaged, the dryer drum won’t turn properly. To determine if the support rollers are worn out, remove the belt from the dryer and try turning the drum by hand. If the drum does not rotate freely, check the support rollers or axles for wear. If one or more of the rollers are worn out, we recommend replacing all of the rollers at the same time as a preventative measure. (The axle can often be reused if it is in good condition. Clean the axle thoroughly before installing the new rollers.)
Kenmore Dryer Drive Motor
The drive motor turns the drum and the blower wheel to exhaust the air. First, check the motor to see if it makes a humming noise. If the motor still hums, remove the belt from the motor and check the blower wheel to ensure that it is not obstructed. Next, with the belt removed, try rotating the drum by hand. If the drum does not rotate freely, determine what is causing the drum to bind. If the drum turns freely and the blower wheel is clear of obstructions, the drive motor might be defective. If you suspect the motor is at fault, replace it.
Kenmore Dryer Maintenance Kit
A dryer maintenance kit will often include a drive belt and idler pulley, and may include rollers, a rear drum bearing, a felt seal, and other components. Since a broken drive belt, damaged idler pulley, and worn out rollers or drum bearings are the top causes of a dryer drum not turning, installing a new maintenance kit should solve the problem.
Kenmore Dryer Overheating
Kenmore Dryer Heating Element
The heating element warms the air before the air enters the dryer drum. If the element is partially shorted out, it may produce heat continuously, even if the dryer has reached the proper temperature. When this happens, the dryer gets too hot. To determine if the heating element is at fault, use a multimeter to test each terminal for continuity to the case. If the heating element has continuity to the case, it is shorted out. If the heating element is shorted out, replace it.
Kenmore Dryer Heating Element Assembly
The heating element warms air as it passes over the element. If the element is partially shorted out, it may produce heat continuously, even if the dryer has reached the proper temperature. When this happens, the dryer gets too hot. To determine if the heating element is at fault, first use a multimeter to test the heating element for continuity. If the heating element does not have continuity, replace it. Next, test for continuity from each terminal to the case. If the heating element has continuity to the case, it is shorted out. If the heating element is shorted out, replace it.
Kenmore Dryer Timer
A dryer that is overheating could be caused by a faulty timer allowing continuous voltage to be sent to the heating circuit. If the timer’s heating contacts and the heating element are shorted, the heating element can heat when the timer is off. However, this is very rarely the case. Before replacing the timer, check all the more commonly defective parts. If you determine that all of the other components are working properly, test the timer by using a multimeter and consulting the wiring diagram. If the timer is defective, replace it.
Air Flow Problem
If the vent is clogged or partially clogged, it will restrict the airflow through the dryer, substantially increasing the drying time. To ensure proper dryer performance, you should clean your dryer’s venting system at least once per year.
Kenmore Dryer Drive Motor
A dryer’s drive motor will drive the drum belt to rotate the drum as well as spin a blower wheel to circulate the air through the drum during operation. If the dryer runs for a while and then stops, and won’t start again until it cools down, it’s likely the drive motor is malfunctioning and will need to be replaced.
Kenmore Dryer Thermistor
A dryer thermistor monitors the dryer temperature and sends a resistance reading to the control board. If the thermistor is malfunctioning, it may fail to send the correct reading to the control board resulting in the dryer overheating. If you’ve determined there is good air flow coming out the home’s outside vent hood and the dryer venting is free of obstructions, the thermistor is one of the components you can test for electrical continuity with a multimeter to see if it’s functioning properly. While the thermistor should have continuity at room temperature, the ohm’s reading should go lower as the temperature on the sensor increases. If the thermistor has shorted or shows no continuity it should be replaced with a new one. Thermistors rarely get out of calibration.
Kenmore Dryer Main Control Board
A dryer’s main control board controls the voltage being sent to all of the appliance’s electrical components. If a relay on the board has shorted, it may sent continuous voltage to the heating circuit causing the dryer to overhead. To help determine this, you can inspect the board for signs of damage or a shorted component.
Clogged lint filter
A clogged lint filter will cause a loss of air flow, which can cause the dryer to overheat and eventually trip the thermal fuse. For the best drying performance, clean the lint filter before starting the dryer. If you use dryer sheets, residue can build up on the lint filter. If you cannot blow air through the dryer lint filter it will need to be cleaned with a brush, soap, water. Confirm the lint filter housing and grille, if applicable, are free of lint build up as well.
Kenmore Dryer Cycling Thermostat
The cycling thermostat cycles the heat on and off to maintain the proper air temperature. If the thermostat is defective, it may keep the heat on too long, causing the dryer to get too hot. However, this is rarely the case. Before replacing the cycling thermostat check all the more commonly defective parts. If you have determined that all of the other components are working properly, test the thermostat by using a multimeter to test it for continuity. If the thermostat does not have continuity, replace it.
Kenmore Dryer Felt Seal
Most dryers have a felt seal at the front and rear of the drum to prevent heat from escaping the drum. If the seal is worn out or missing, the heat will not be drawn through the drum properly, causing the dryer to get too hot. Check the drum seal to ensure that it is creating a reliable seal around the drum. However, this is rarely the case. Before replacing the felt seal check all the more commonly defective parts. If you have determined that all of the other components are working properly, replace the felt seal.
Kenmore Dryer High Limit Thermostat
The high limit thermostat monitors the air temperature in the dryer’s blower housing, heating element, or heat duct and is intended to shut off the voltage to the heating circuit if the air temperature gets too hot. If the thermostat is defective, it may allow the heat to stay on too long, causing the dryer to get overheated. However, this is rarely the case. Before replacing the high limit thermostat check all the more commonly defective parts. If you have determined that all of the other components are working properly, test the thermostat by using a multimeter to test it for electrical continuity. If the thermostat does not have continuity, replace it.
Kenmore Dryer Blower Wheel
The blower wheel works with the drive motor to draw air into the dryer drum. Clumps of lint, socks, and small articles of clothing can escape the lint filter and get caught in the blower wheel. In addition, the blower wheel sleeve can wear out, allowing the blower wheel to wobble on the motor shaft. If the blower wheel is obstructed or defective, the dryer may get too hot. To determine if the blower wheel is working properly, remove the dryer vent and assess the strength of the air flow. If the air flow is weak, check the blower wheel for obstructions. If no obstructions are present, try rotating the blower wheel by hand. If the blower wheel wobbles as it turns, replace it.
Kenmore Dryer Control Board
A dryer’s control board controls the voltage being sent to all of the appliance’s electrical components. If a relay on the board has shorted, it may sent continuous voltage to the heating circuit causing the dryer to overhead. To help determine this, you can inspect the board for signs of damage or a shorted component.
Kenmore Dryer Startup Failures
The Kenmore Dryer Won’t Start? The dryer won’t turn on, or the timer doesn’t advance, or your clothes are still wet after you’ve run a cycle. If this is the case, you’re not alone. This is a common problem with many dryers, and it’s pretty easy to fix.
You’re having a hard time finding an answer to this problem, aren’t you? When the dryer won’t turn on and isn’t heating up, it leaves you feeling helpless. But you don’t need to be. You can narrow down the problem to just a few components that could be responsible for your dryer not starting.
Problems with a Kenmore dryer can be caused by many issues, including a faulty start switch. This is part of the Kenmore dryer’s safety mechanism and is designed to prevent an overloaded machine from being turned on. It’s important to troubleshoot problems and test the fuse, gasket, belt and door switch before replacing the entire dryer.
Kenmore Dryer Won’t Start – Troubleshoot and Diagnosis
A dryer might not be something you think about on a regular basis, but it’s an essential piece of laundry equipment that gets a lot of use. And it’s the last thing you want to fix when you’re in a hurry and don’t have time to take it to the repair shop. So when your Kenmore dryer stops working right, it can be a major problem.
Incoming Power Problem
If a Kenmore dryer’s start switch button is constantly engaged but the machine won’t turn on, it may be an indication of either a defective power cord or a defective control panel. The most common reason for such problems is an overloaded outlet or circuit. The first step in troubleshooting is to unplug the unit and check the outlet to ensure that it’s supplying electricity.
If your dryer control panel isn’t lighting up, it usually means that something is wrong with the dryer’s electrical wiring. Before you begin troubleshooting, make sure that the power switch on the outlet box is in the “on” position and that there’s power coming through the outlet by plugging in a lamp or other electrical device. If the light works, then you likely have a problem with your dryer.
You forgot to plug in the dryer: Make sure that the dryer’s electrical cord is connected to a working outlet on the wall or in the back of the dryer.
We do not recommend using an extension cord to operate your dryer. The high voltage required for the operation of the dryer cannot be transmitted safely through a standard extension cord. This is a safety hazard, and can result in the dryer cutting off power, which is why we don’t recommend it.
When your home’s wiring trips a breaker, the resulting power outage can be inconvenient in more ways than you expected. Here’s what to do: (If you have multiple breakers on a single circuit, check every one.) If a breaker trips while an appliance is on, an overload has occurred. Remove the appliance and reconnect it. If the breaker trips again, too many devices are plugged into that circuit.
Incorrect Dryer Settings
It’s possible that the Kenmore dryer is lit up but won’t start, but before you dive into troubleshooting, check your settings. As with any appliance or home device, something as simple as selecting the correct settings for your load can save you time and help prevent problems. When it comes to troubleshooting your Kenmore dryer, make sure the settings are correct. Setting the wrong dryer setting can result in a long wait for a laundry load to complete or it not starting at all.
With the control lock feature, you can lock the dryer’s control panel so that it is not possible to start or stop the dryer. Conversely, with the delay start function, you can delay the beginning of a making cycle. This will give you more time to prepare clothing or accessories and ensure that clothing is properly dried without wrinkles or creases. You need to disable both of these settings.
Door is Not Properly Latched
If your Dryer Door Won’t Close, it could be a variety of issues, but luckily there are a few simple fixes you can try before calling your service provider. Check the door latch that keeps the dryer door from opening during operation. The latch should be closed completely when the dryer is operating and laundry is drying. If it is not, close the latch and then re-open the dryer door to ensure it opens freely.
The door latch is the main thing that prevents the door from opening during a drying cycle. If the door latch isn’t engaged and your dryer won’t start, it’s likely that the problem is in the door latch assembly or spring.
Kenmore Dryer Excessive Noise
01 – Kenmore Dryer Drive Belt
The drive belt is a very long, slender belt that wraps all the way around the dryer drum, around a tension pulley, and then around the drive motor. Over time, the drive belt can become frayed or otherwise damaged. If the drive belt is frayed or damaged, the dryer will be noisy as it turns. Inspect the drive belt for signs of wear. If the drive belt is worn, replace it.
02 – Kenmore Dryer Drum Roller
One or more of the drum rollers might be worn out. Many dryers have two drum support rollers on the rear of the drum, and some dryers have two more rollers supporting the front of the drum. When the drum rollers are worn out, they can cause the dryer to make a loud rumbling noise. To determine if the rollers are worn out, inspect the rollers. If one or more of the rollers are severely worn, we recommend replacing all of the rollers at the same time as a preventative measure. (The roller shaft can often be reused if it is in good condition. Clean the shaft thoroughly before installing the new rollers.)
03 – Kenmore Dryer Drum Roller Axle
One or more of the drum roller axles might be worn out. Most dryers have two drum support rollers on the rear of the drum, and some dryers have two more rollers supporting the front of the drum. Over time, the drum rollers and axles wear out, causing the dryer to make a loud rumbling noise. To determine if the drum roller axles are worn out, remove the belt from the dryer and try turning the drum by hand. If the drum does not rotate freely, check the support rollers for wear. If the rollers spin freely without wobbling, the axles do not need to be replaced. If a roller wobbles and/or does not spin freely, we recommend replacing all of the axles and rollers as a preventative measure.
04 – Dryer is not level
Confirm the dryer is level. A dryer that is not level can cause excessive wear on certain parts such as bearings and glides, resulting in noisy operation. If the dryer is not level, adjust the leveling legs as necessary.
05 – Kenmore Dryer Blower Wheel
The blower wheel draws air through the dryer and pushes the air out the vent. Clumps of lint, socks, and small articles of clothing can escape the lint filter and get caught in the blower wheel. If an object is caught in the blower wheel, the dryer may make noise. In addition, the blower wheel sleeve can wear out, allowing the blower wheel to wobble on the motor shaft. To determine if the blower wheel is working properly, remove the dryer vent and assess the strength of the air flow. If the air flow is weak, check the blower wheel for obstructions. If no obstructions are present, try rotating the blower wheel by hand. If the blower wheel wobbles as it turns, replace it.
06 – Kenmore Dryer Drum Bearing
The drum bearing supports the rear of the dryer drum. Over time, the drum bearing wears out. If the drum bearing is worn out, the dryer may make noise. To determine if the drum bearing is at fault, remove the dryer belt and try turning the drum by hand. If the drum rotates freely, it is unlikely that the drum bearing is worn out. If the drum makes squealing or grinding sounds when turned and/or is hard to turn, check the drum bearing and replace it if necessary.
07 – Kenmore Dryer Drum Support Roller & Axle
Most dryers have two drum support rollers on the rear of the drum, and some dryers have two more rollers supporting the front of the drum. The rollers must spin freely to work properly. Over time, the drum roller axles can wear out, causing the rollers to bind. If the rollers are worn out or start binding, the dryer may make a loud rumbling noise. To determine if the support rollers are worn out, remove the belt from the dryer and try turning the drum by hand. If the drum does not rotate freely, check the support rollers for wear. If the rollers spin freely without wobbling, they do not need to be replaced. If a roller wobbles and/or does not spin freely, we recommend replacing all of the axles and rollers as a preventative measure.
08 – Kenmore Dryer Maintenance Kit
If your dryer is making noise and you aren’t sure which part to replace, you can purchase a dryer maintenance kit. The dryer maintenance kit contains all of the parts that are commonly defective when the dryer is noisy. Search for your model number to find the maintenance kit applicable to your dryer.
09 – Kenmore Dryer Blower Wheel and Housing
The dryer blower wheel is the component that circulates the air through the dryer drum. If the blower wheel is damaged or loose on the motor shaft, or there is an obstruction in the blower housing, you may hear a scraping, rattling, or vibrating noise.
10 – Kenmore Dryer Drum Support Bearing
The drum bearing supports the rear of the dryer drum. Over time, the drum bearing wears out. If the drum bearing is worn out, the dryer may make noise. To determine if the drum bearing is at fault, remove the dryer belt and try turning the drum by hand. If the drum rotates freely, it is unlikely that the drum bearing is worn out. If the drum makes squealing or grinding sounds when turned and/or is hard to turn, replace the drum bearing.
11 – Kenmore Dryer Drum Slide Glide or Pad
The drum glides (also called slides) might be worn out. The drum glides are small plastic pieces that support the front of the dryer drum. As the drum rotates, it slides on these plastic pieces. Over time, the drum glides wear out. If the drum glides are worn out, the dryer will make noise. To determine if the drum glides are worn out, inspect them for wear. If one or more glides are worn out, replace all of the glides as a set.
12 – Items loose in drum
Check the drum for items that may have fallen out of pockets. Screws, nails, and coins are common items that will make noise if they are loose in the dryer. For scraping noises also look for items caught between the front and rear drum seal and bulkhead.
13 – Kenmore Dryer Idler Pulley
Inspect the idler pulley for signs of wear. If the idler pulley is worn or damaged, we recommend replacing the drive belt in addition to replacing the idler pulley.
14 – Kenmore Dryer Idler Assembly
Inspect the idler assembly for signs of wear. If the idler assembly is worn or damaged, we recommend replacing the drive belt in addition to replacing the idler assembly.
15 – Kenmore Dryer Drive Motor
The drive motor bearings might be worn out. However, this is rarely the case. Before replacing the drive motor, check all the more commonly defective parts. If you have determined that all of the other components are working properly, replace the drive motor.
Kenmore Dryer No Heat or Insufficient Heating
Kenmore Dryer Thermal Fuse
The thermal fuse is a safety device designed to protect the dryer from overheating. The fuse is located on the blower housing or at the dryer’s heat source such as the heating element on electric dryers or at the burner on gas models. The fuse should be closed for continuity meaning it has a continuous electrical path through it when good. If overheated the fuse will have no continuity meaning the electrical path is broken and the fuse has blown. A multimeter can be used to test it for continuity. Be aware that a blown thermal fuse is an indication of a restricted exhaust vent from the dryer to the outside. Always check the dryer venting when replacing a blown thermal fuse.
Kenmore Dryer Drive Motor
Most dryer drive motors have a centrifugal switch that energizes a start winding when the motor is first started and closes a heat cycle contact to allow the heat source to work. If the motor’s centrifugal switch is faulty, either the motor won’t run or the motor will run but the dryer won’t heat. Since most centrifugal switches are not sold separately, the entire motor will need to be replaced if the switch is defective.
Kenmore Dryer Gas Valve Solenoid
Gas dryers have two or more gas valve solenoid coils. The gas valve solenoids open the gas valve ports to allow gas to flow into the burner assembly. If a gas valve solenoid fails, the dryer won’t heat. To determine if one or more of the gas valve solenoids has failed, check the igniter. If the igniter glows and goes out but does not ignite the gas, the gas valve solenoid is defective. If one or more of the gas valve coils are defective, we recommend that you replace them as a set.
Incorrect cycle settings
Ensure the dryer is set to the appropriate heat setting. The setting may have been inadvertently changed to a non-heat option.
Kenmore Dryer Igniter
The igniter uses heat to ignite the gas in the burner assembly. If the igniter is not working, the gas will not ignite, preventing the dryer from heating. To determine if the igniter has burned out, use a multimeter to test the igniter for continuity. If the igniter does not have continuity, replace it.
Kenmore Dryer Heating Element
The heating element warms the air before it enters the dryer drum. Over time, the heating element can burn out, causing the dryer not to heat. To determine if the heating element has burned out, use a multimeter to test it for continuity. If the heating element does not have continuity, replace it.
Kenmore Dryer Heating Element Assembly
The heating element assembly warms the air before it enters the dryer drum. Over time, the heating element can burn out, causing the dryer not to heat. To determine if the heating element assembly has burned out, use a multimeter to test it for continuity. If the heating element assembly does not have continuity, replace it.
Kenmore Dryer Flame Sensor
On a gas dryer, the flame sensor detects the heat emitted by the flame. If the flame sensor isn’t working, the dryer won’t heat. Before checking the flame sensor, first make sure that the igniter and thermal fuse are not at fault. To determine if the flame sensor is defective, use a multimeter to test the sensor for continuity at room temperature. If the flame sensor does not have continuity at room temperature, replace it.
Kenmore Dryer Control Board
A dryer’s control board controls the voltage being sent to all of the appliance’s electrical components. If the board is defective, it may not allow voltage to reach the heating circuit. You can inspect the board for signs of damage or a shorted component. You can also use a multimeter to test for voltage reaching the drive motor after reviewing the dryer’s wiring diagram.
Incoming Power Problem
An electric dryer heater requires 220 volts to operate properly. If the incoming voltage is incorrect the dryer can run and not heat.
Kenmore Dryer Thermistor
A dryer thermistor monitors the temperature of the burner or heater housing and will shut off the heat once a sufficient temperature is reached. If the thermistor is faulty, the dryer may not heat at all.
Kenmore Dryer High Limit Thermostat
The high-limit thermostat monitors the dryer temperature and shuts off the burner if the dryer overheats. If the high-limit thermostat is malfunctioning, it may shut off the burner even if the dryer is not overheating. However, this is rarely the case. Before replacing the high limit thermostat check all the more commonly defective parts. If you have determined that all of the other components are working properly, test the thermostat by using a multimeter to test it for continuity. If the thermostat does not have continuity, replace it.
Kenmore Dryer Gas Valve Assembly
A dryer’s gas valve assembly will open to allow gas to flow into the burner tube to ignite into a flame to heat the air being circulated through the dryer drum. If the gas valve assembly is malfunctioning, the dryer may not heat.
Kenmore Dryer Cycling Thermostat
The cycling thermostat cycles the heat on and off to regulate the air temperature. If the cycling thermostat is defective, the dryer will not heat. However, this is rarely the case. Before replacing the cycling thermostat check all the more commonly defective parts. If you have determined that all of the other components are working properly, test the thermostat by using a multimeter to test for continuity. If the thermostat does not have continuity, replace it.
Kenmore Dryer Main Control Board
The main control board might be defective. However, this is rarely the case. Before replacing the main control board, check all of the more commonly defective parts. If you have determined that all of the other components are working properly, replace the main control board. (The control board cannot be easily tested, but you can try to inspect it for signs of burning or a shorted-out component.)
Kenmore Dryer Timer
If the dryer doesn’t heat, the timer might be defective. However, this is very rarely the case. Before replacing the timer, check all the more commonly defective parts. If you determine that all of the other components are working properly, test the timer by using a multimeter and consulting the wiring diagram. If the timer is defective, replace it.
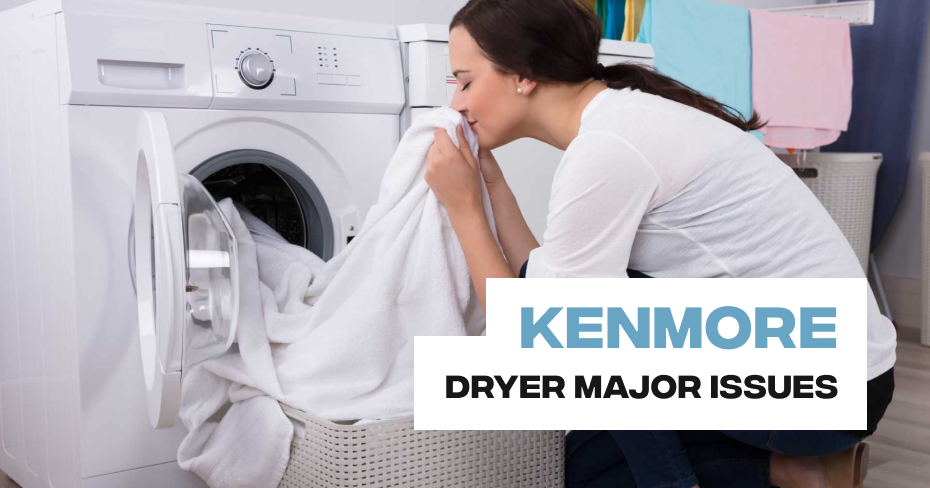
Kenmore Dryer Major Issues
While Kenmore dryers are renowned for their durability, like any appliance, they may encounter major issues over time. These issues can range from heating problems and unusual noises to startup failures or control panel malfunctions. Dealing with these problems can be frustrating, but you don’t have to tackle them alone.
In this blog, we will explore common major issues that Kenmore dryers may experience and provide valuable insights on how to address them. At Appliance Repair Los Angeles, our team of skilled technicians is here to assist you with any Kenmore dryer major issues you may be facing. We understand the importance of having a fully functional dryer, and our experts have the knowledge and experience to diagnose and resolve these problems swiftly and effectively.
- No Heat or Insufficient Heating
- Excessive Noise
- Startup Failures
- Overheating
- Drum Not Rotating
- Control Panel Malfunctions
- Burning Smell
- Lint Accumulation
If you’re experiencing major issues with your Kenmore dryer and need professional assistance, don’t hesitate to reach out to us. You can contact Appliance Repair Los Angeles at 323-792-1970 to schedule an appointment with our dedicated team. We’re committed to getting your Kenmore dryer back in working order, ensuring your laundry needs are met without any disruptions.
Kenmore Washer Error Code LE
The LE error code on a Kenmore front-load washer means that the washer won’t run at all or at the expected speed because the drive motor has locked up. Possible causes can range from overloading your washer and using too much detergent to an obstruction in the washer’s drive system, loose wiring connections or a failed drive motor or tachometer.
Try these troubleshooting steps with your washer to find the cause of the drive motor problem and clear the LE code.
Overloaded washer
Make sure the washer isn’t overloaded. Pull some clothes out and restart the cycle. For future loads, fill the basket loosely.
Too much detergent
If you see lots of suds in the tub, let the washer sit idle for 30 minutes so the foam dissipates. Next, start a Drain/Spin cycle to remove the sudsy water. Then run a new cycle without adding any detergent to wash and rinse the current load.
For future loads, reduce the amount of high-efficiency (HE) detergent to about 1 tablespoon per load.
Drive system obstruction
If you didn’t overload the washer and you don’t see excessive suds, check the rotation of the spin basket.
First, cancel the wash cycle and pull your clothes out of the washer. Drain any water left in the tub by running a Drain/Spin cycle with No Spin selected. If this cycle doesn’t remove the water, unplug the washer and suck out the water through the drain hose using a wet/dry shop vac.
After draining the water, unplug the washer, open the door and manually rotate the spin basket to check for binding or resistance. If the spin basket doesn’t rotate smoothly, there may be an item stuck between the spin basket and the outer tub. A damaged spin bearing also will prevent the spin basket from spinning freely. Have a service technician complete this repair because it requires taking the washer apart completely.
Loose wiring or defective drive motor
If the spin basket rotates smoothly, a problem with the drive motor or tachometer could be causing the LE error code. Loose or broken wires could prevent the drive motor from rotating, as could broken magnets in the motor rotor. Check for loose motor wire connections and examine the motor rotor magnets using these steps:
- Unplug the washer and remove the top and back washer panels.
- Remove the rotor mounting bolt and pull off the motor rotor.
- Check the magnets on the inside edge of the rotor for damage and replace the rotor if you find broken magnets.
- Check the wire harness connections between the electronic control board and the drive motor. Reconnect any loose wires or replace the wire harness if it’s damaged.
- Check the wire harness connections between the tachometer and the electronic control board. Reconnect any loose wires or replace the wire harness if it’s damaged.